
87 Monte SS - Welding
New Tool: Mig Welder
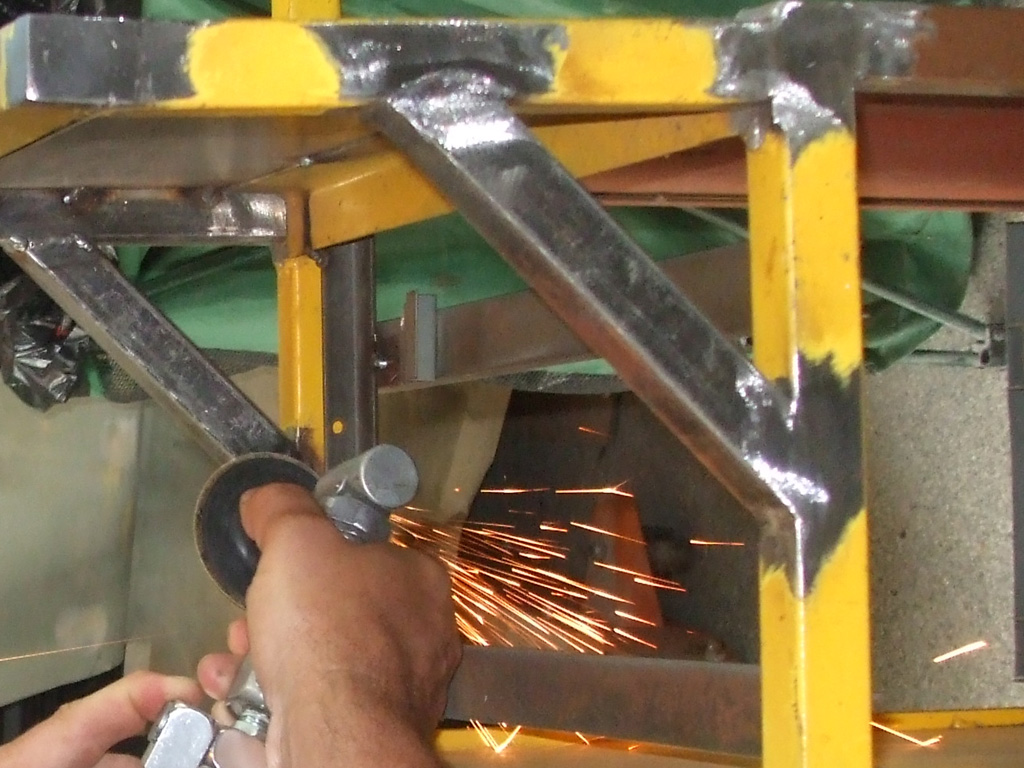
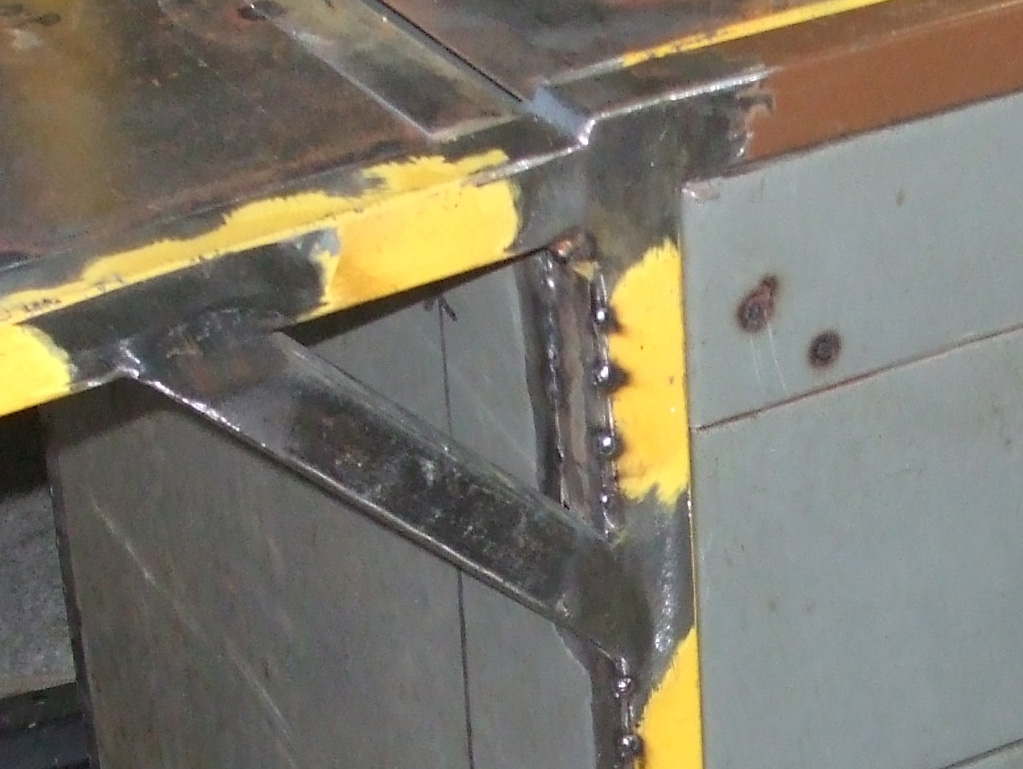
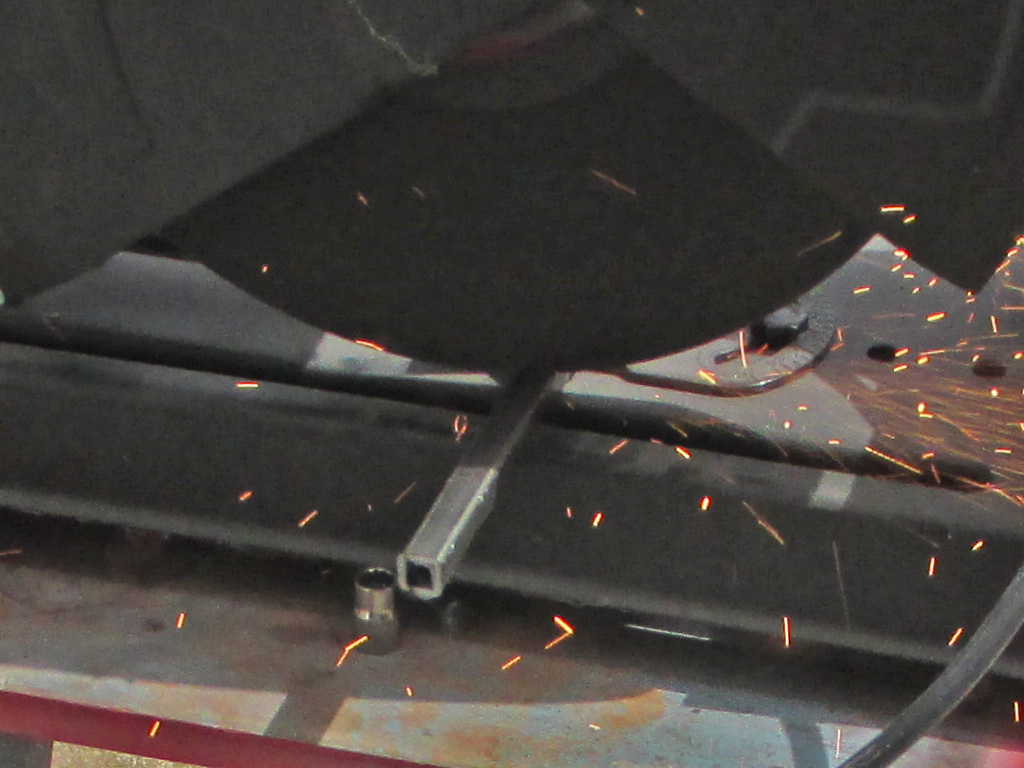
Since my Monte has some rather substantial rust issues (primarily beneath the rear window), the areas in question have been repaired with welding and grinding. With additional body modifications slated for the near future, I decided this was a skill I needed to learn. Years ago my Uncle Ray had offered my Dad & I his little "buzz box" welder. Not sure who/what put the kibosh on that plan (I've got a pretty good idea though), but that was 30 some-odd years ago. Now I'll be able to tackle all those projects where pop-rivets or nuts & bolts just won't cut it.

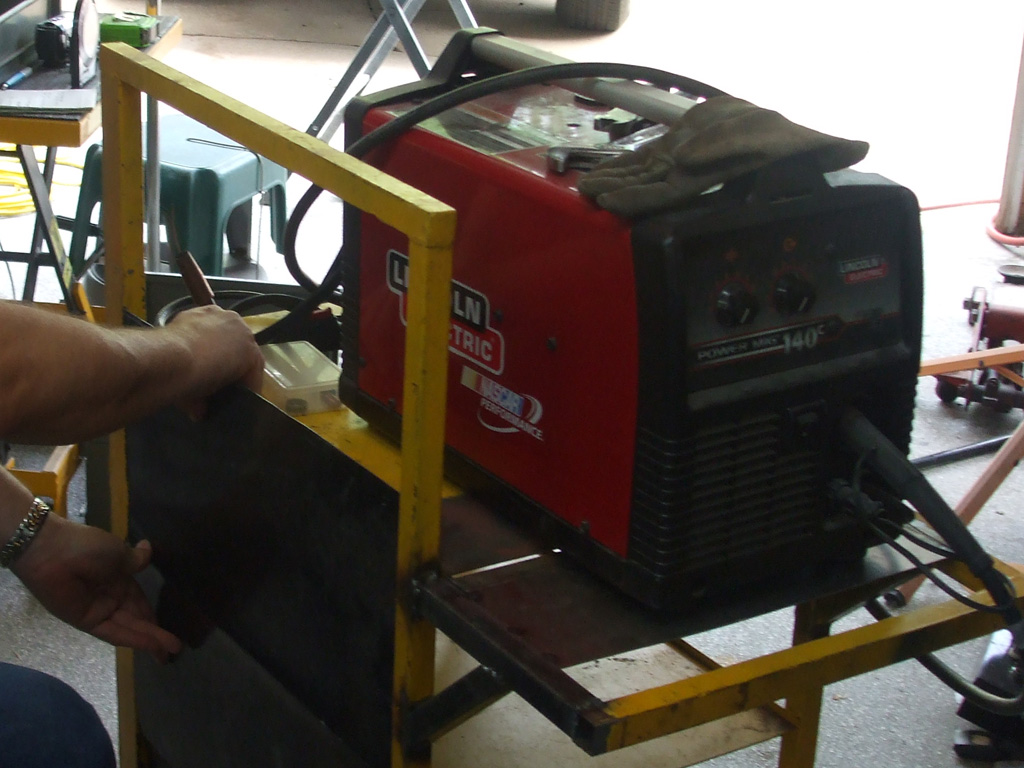
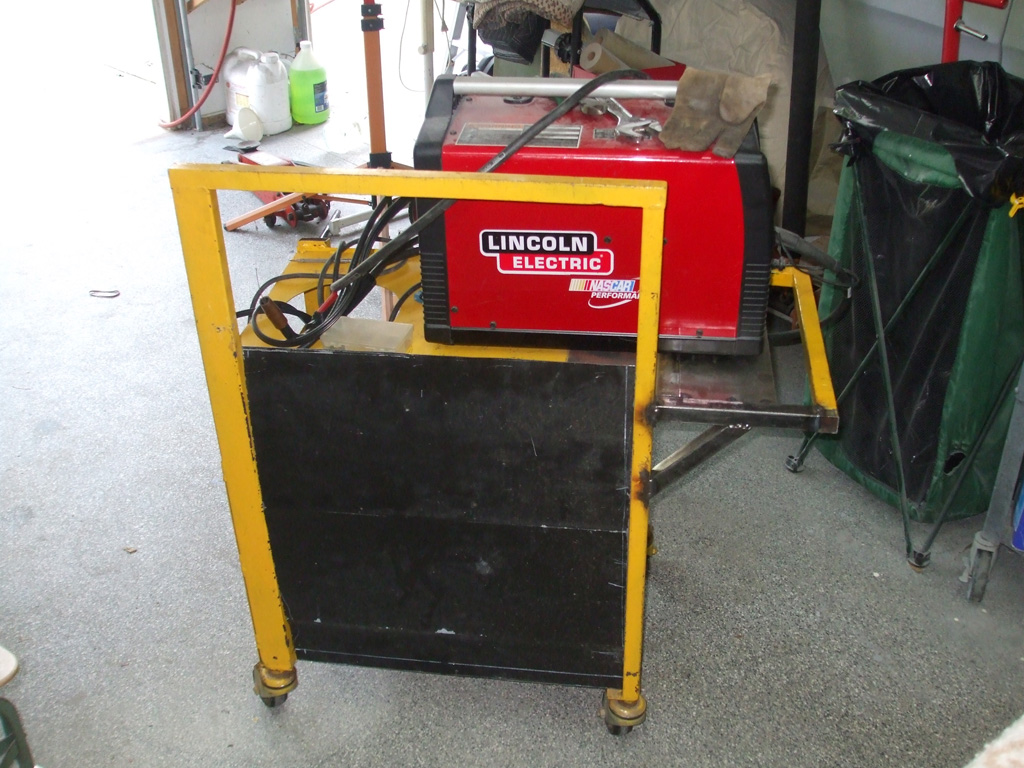
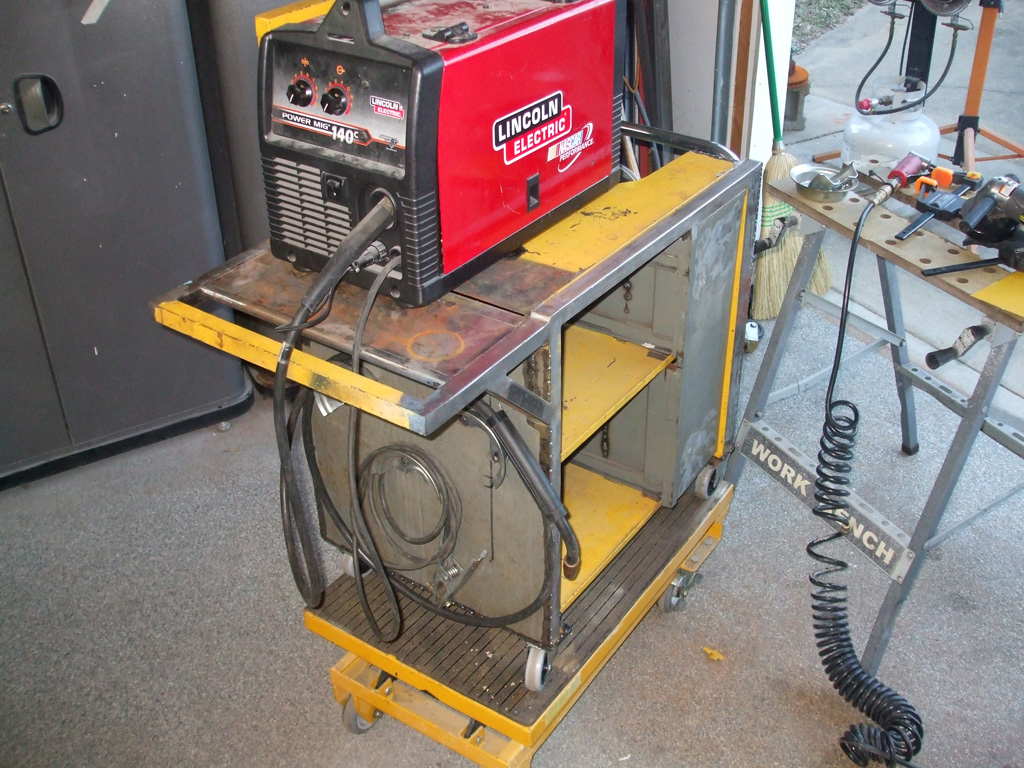
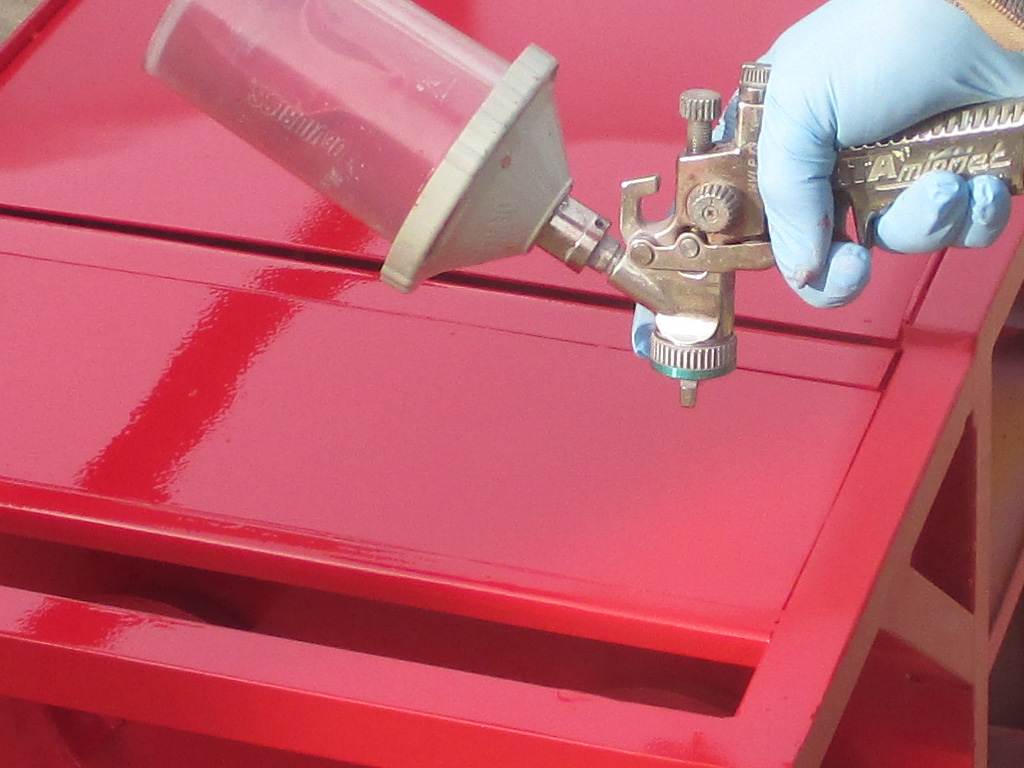
Below, my new welder, although technically portable is heavy... no make that HEAVY! It'll be even heavier once I wrangle a tank of shielding gas necessary for solid wire welding. The obvious solution is a cart but (once again), everything I find that's reasonably priced is also made in China! I thought about it long and hard and decided I could do better for close to the same price as the Chineese stuff.
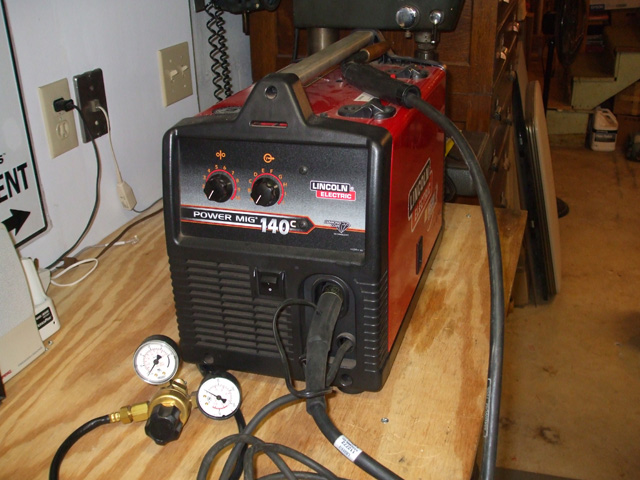
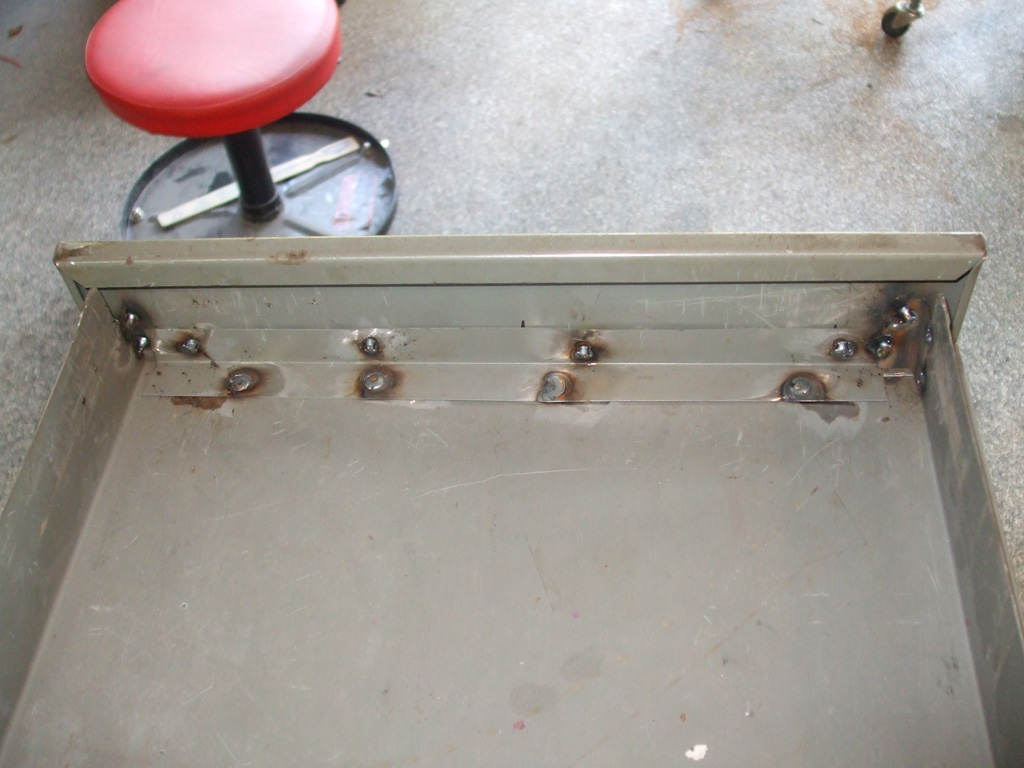
WELDER

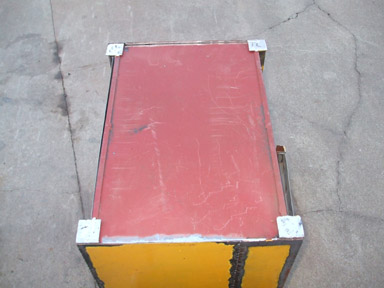
STEEL CABINET
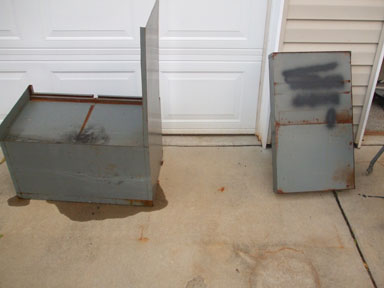
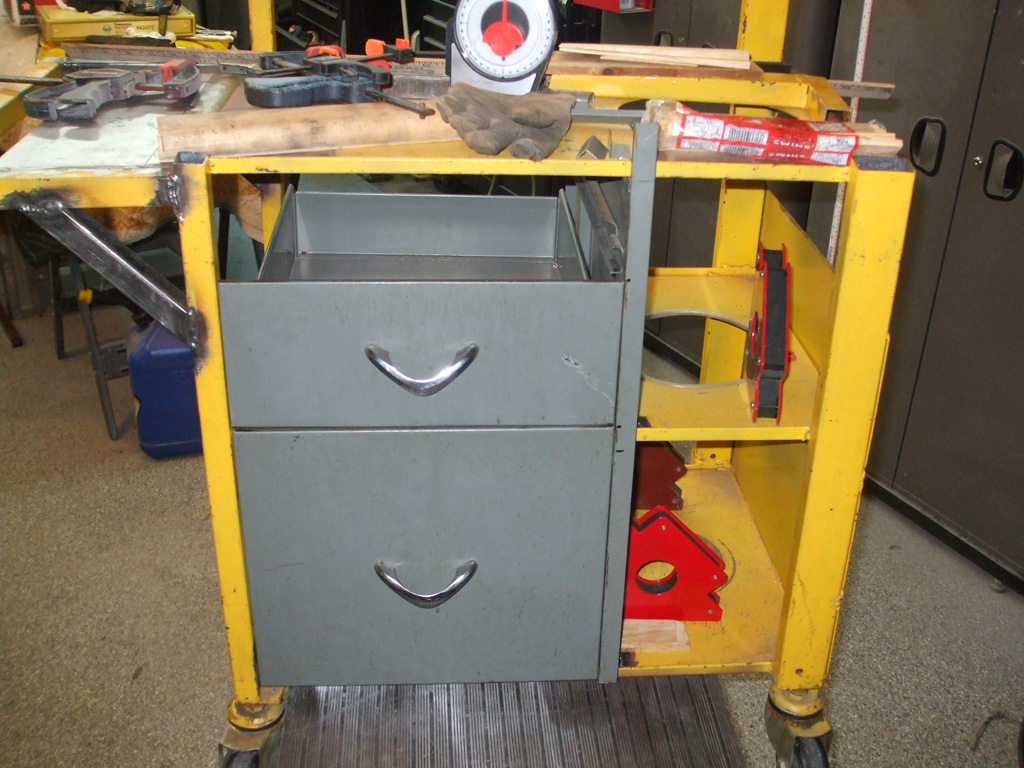
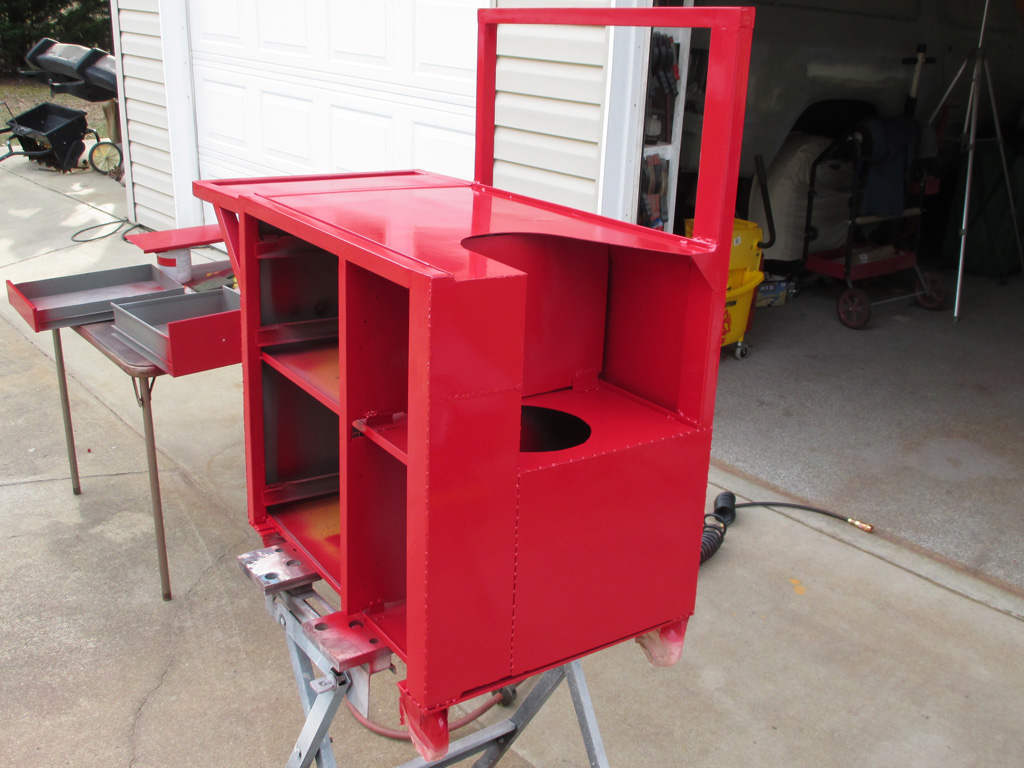
Above right, a trip through the local Habitat for Humanity store netted me an old steel secretary. Since a welder has a lot of supplies, tools etc associated with it, I felt I needed drawers to best organize everything. The plan is to fabricate a frame (with wheels) out of angle iron, add a plate to support the tank of gas, set the cabinet on the frame and the cabinet drawers will open on the same side as the welder's wire compartment. Hang some wire bracket on what will become the front (left side in this shot) and I'll be good to go.
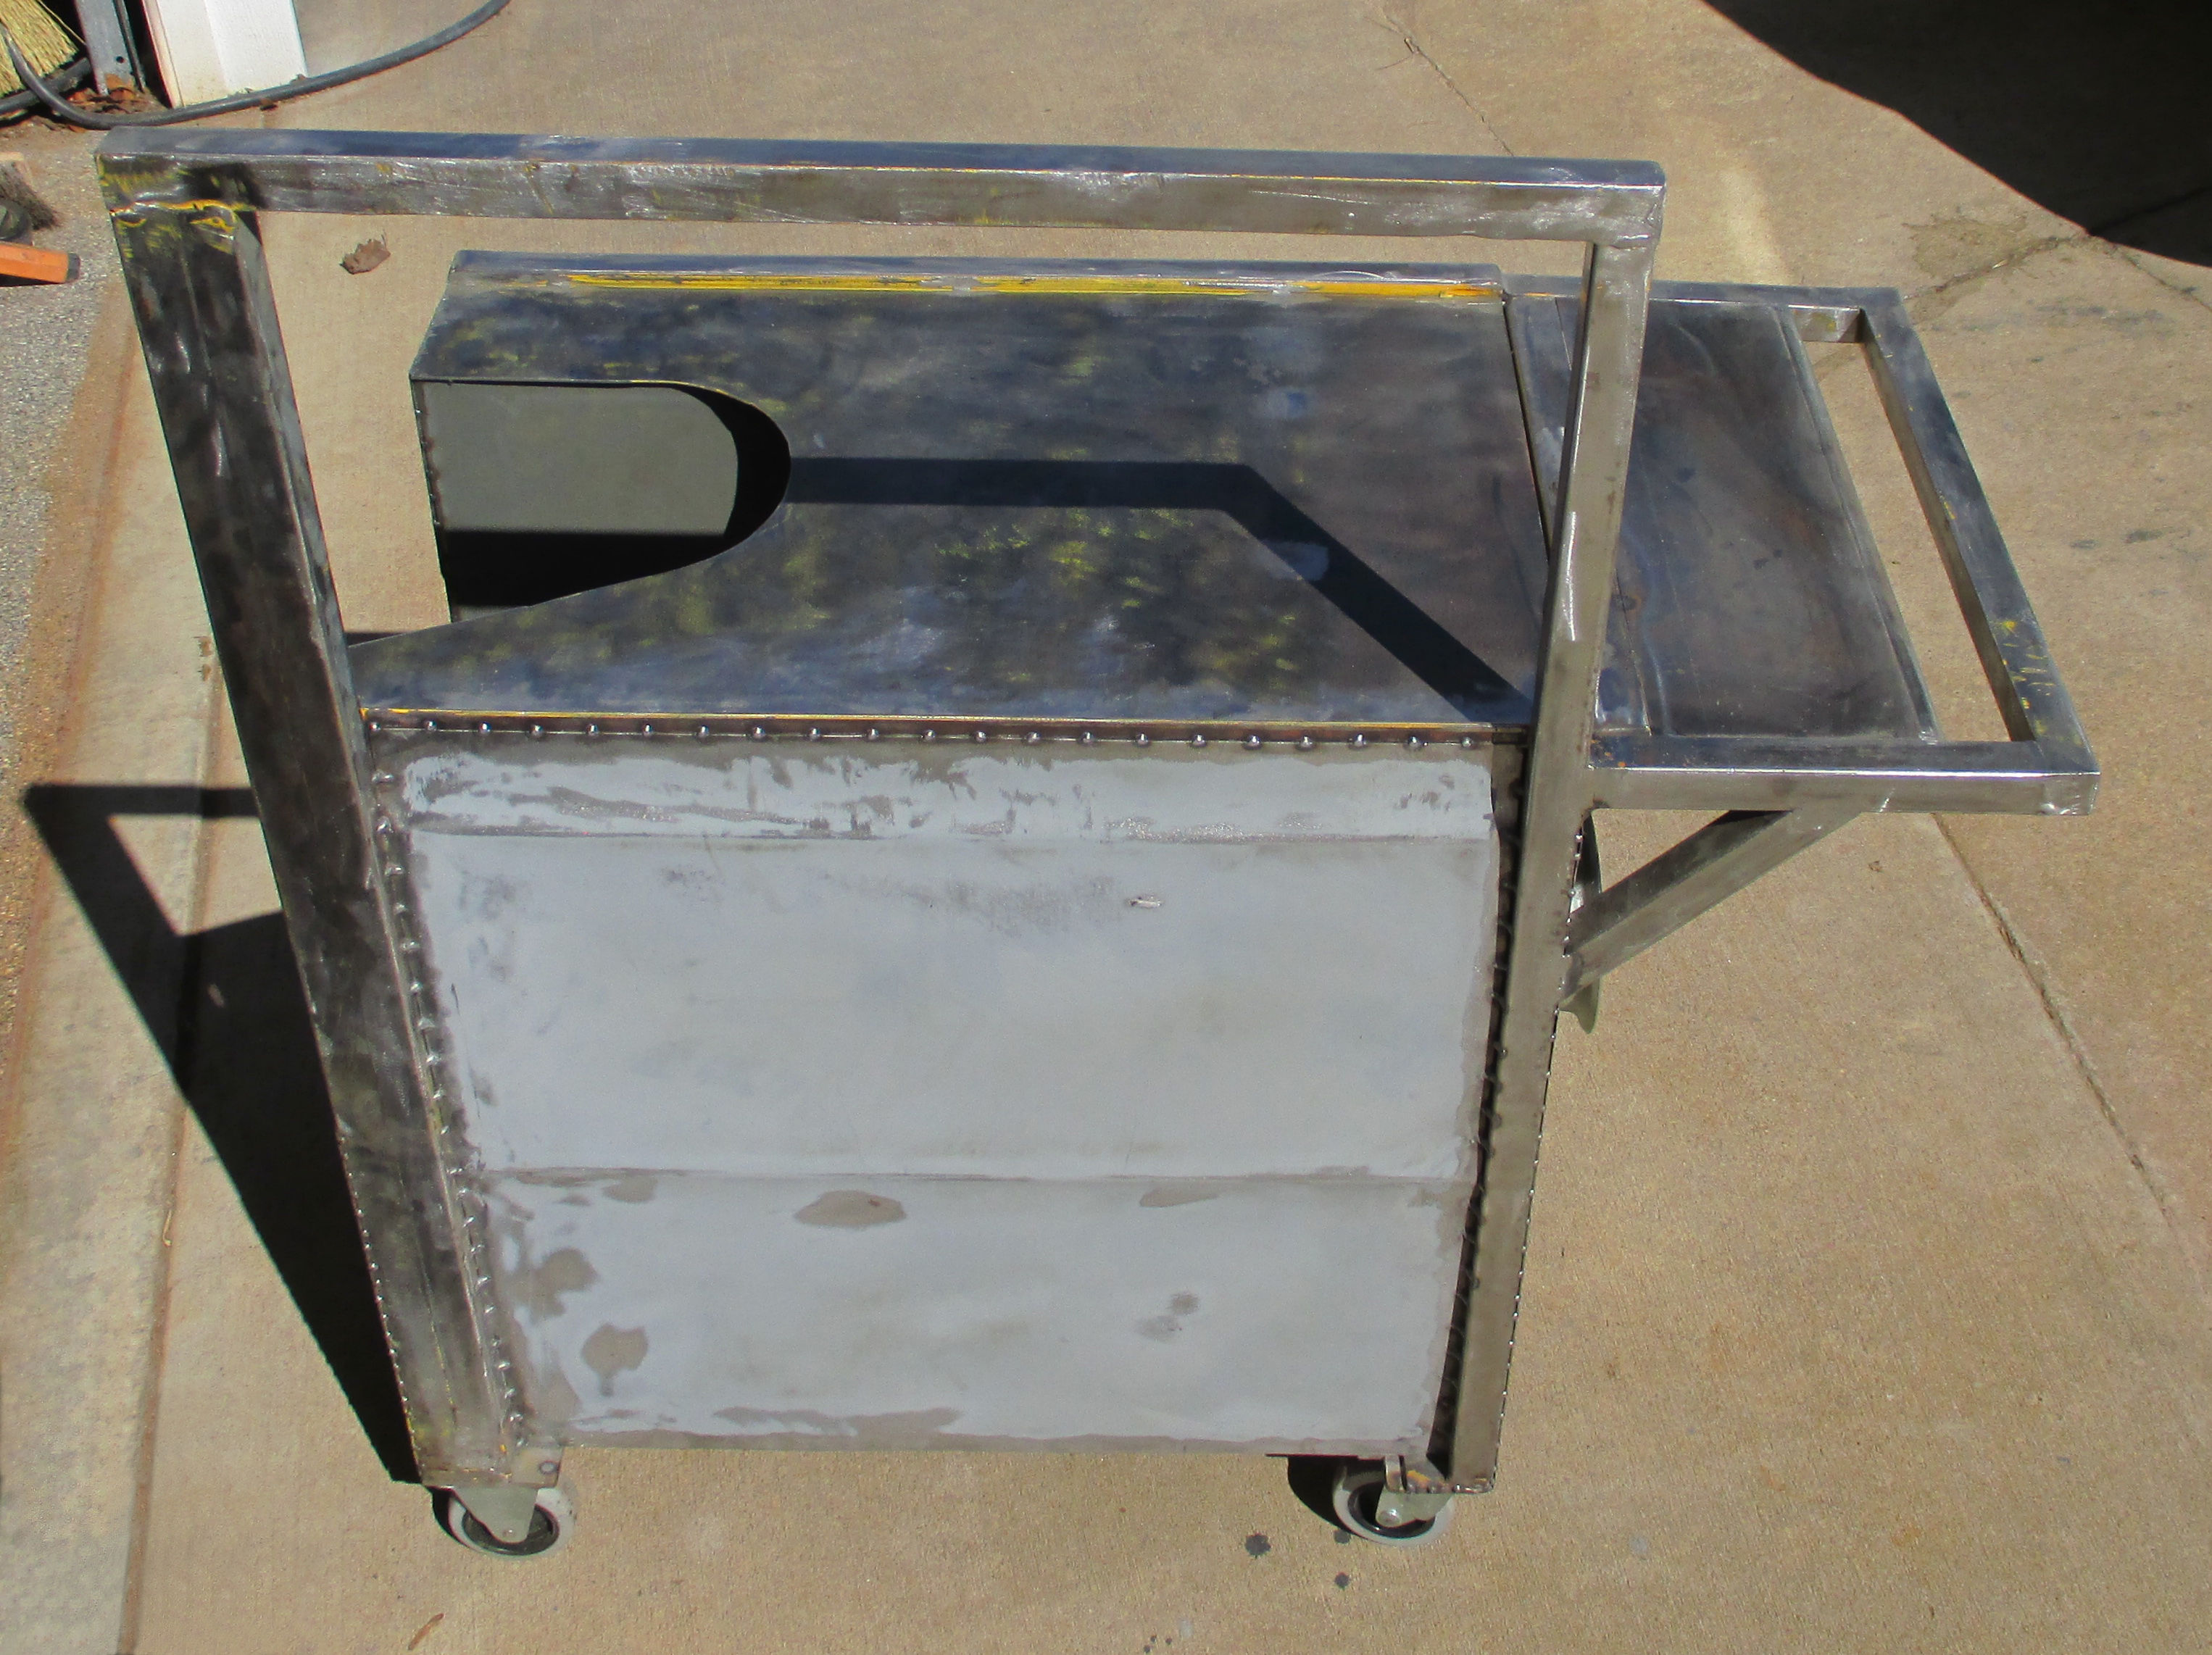
My original idea (based upon the side opening access door on the welder), was to basically use the steel secretary almost as it sat. My plan had been to cut off the upper fold down desk area and mount the welder on top of what remained, giving me a welding cart with three drawers as well as two fixed shelves behind a cabinet door for my helmet and gloves.
In fact I went so far as to collect the additional parts I would require to bring my plan to fruition. Two solid wheels, two heavy duty double casters and some bedrails for the frame that the secretary would sit on. At least that was the plan... at first.
Then, I found an actual home brewed welding cart at the Antique Expo held in Charlotte NC on an anual basis. I gave it the once-over and realized that the original builder made this thing heavy duty. Much more so than the flimsy ones I'd seen at places like Harbor Freight or Northern tool stores... you know, the ones made out of genuine japanesium.
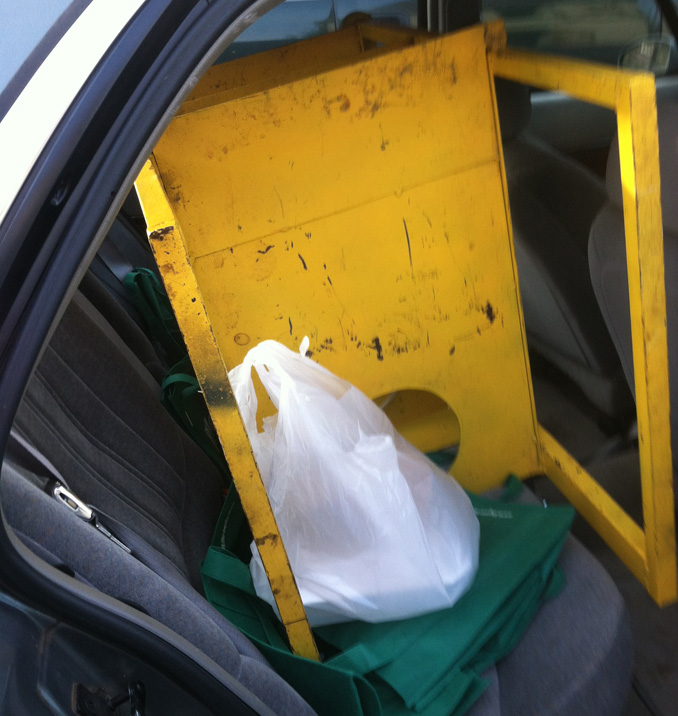
I inquired about the thing (surprizing the seller that I knew it was designed as a mig welding cart), and walked around a bit mulling things over. In the end, I pried three Andrew Jacksons out of my wallet and made it mine. Since we'd been out for a day trip in wifey's Buick that meant there might be some minor "fittment issues" getting the thing home.
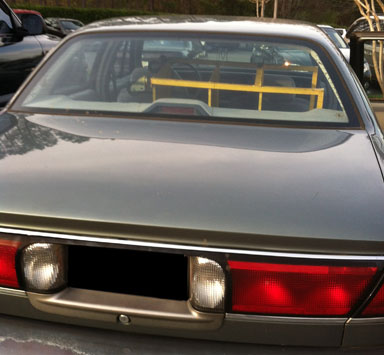
After several unsuccessful attempts to get it into the trunk, it was decided that a better approach would be to slide it in on the back seat. Once I laid down a bunch of those reusable grocery shopping bags to protect the upholstery, we were pretty much good to go.
Of course we were only about 1/2 way through the antique extraveganza, so we went back to finish our shopping spree. Although having spent my mad money the rest of the day was strictly a browsing type of affair.
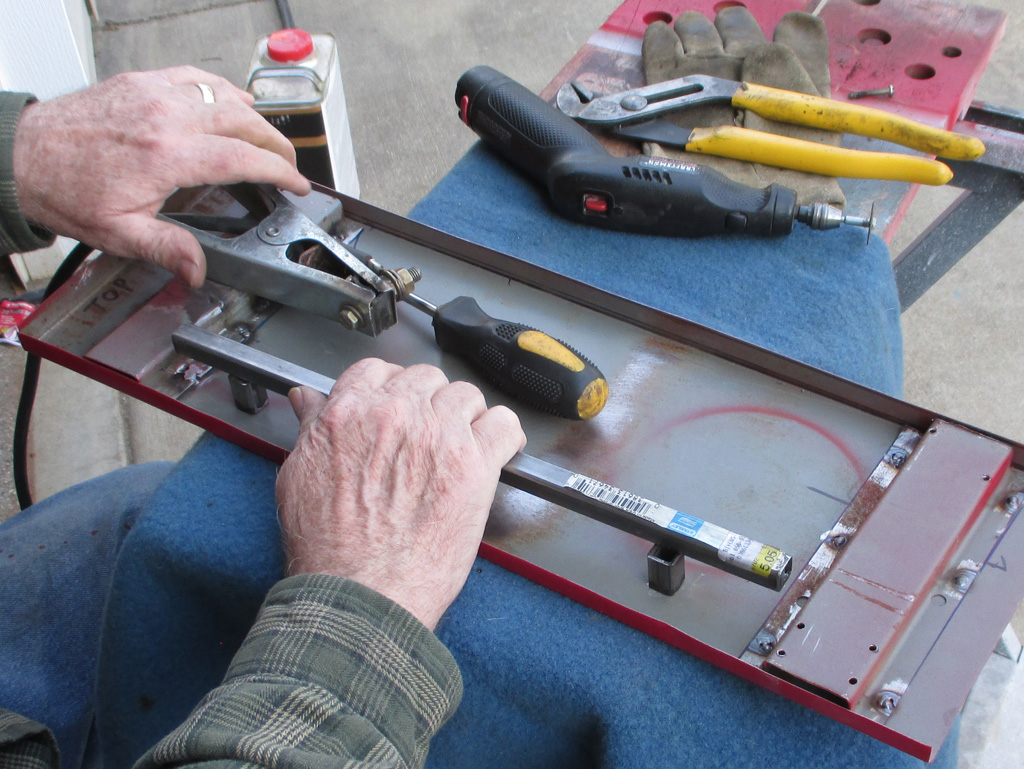
A few things had been done by the time I took this shot. One of the original "handles" has been sawed off, shortened and welded onto the new front of the cart. Then it was time to test fit the new filler panel that will serve to support the front of the welder. Whoever designed the cart originally must've had a stubby welder, might've even been yellow come to think of it.
With the handle welded in place, it was time to make it sturdy. That meant it was time to hack up some 1" square stock (going the extra mile by making some 45* cuts in the steel), then welding them into place as illustrated here.
By the time we're through with this new handle, I'll be able to use it to pull the cart, or clamp things to it or heck, maybe even sit on it by the time we're through. The original "rear" handle will be left as it offers some protection to the welder from stuff in the shop that might fall on it, but can also be used as another handle to move the unit around.

With the handle and extension panel sorted out it was time to revisit the steel secretary and begin taking it apart to built the new hybrid cart. What I really wanted was to utilize the drawers. Removing the drawers was the easy part... removing the bracketry that held the drawers in place was a bit more challenging.
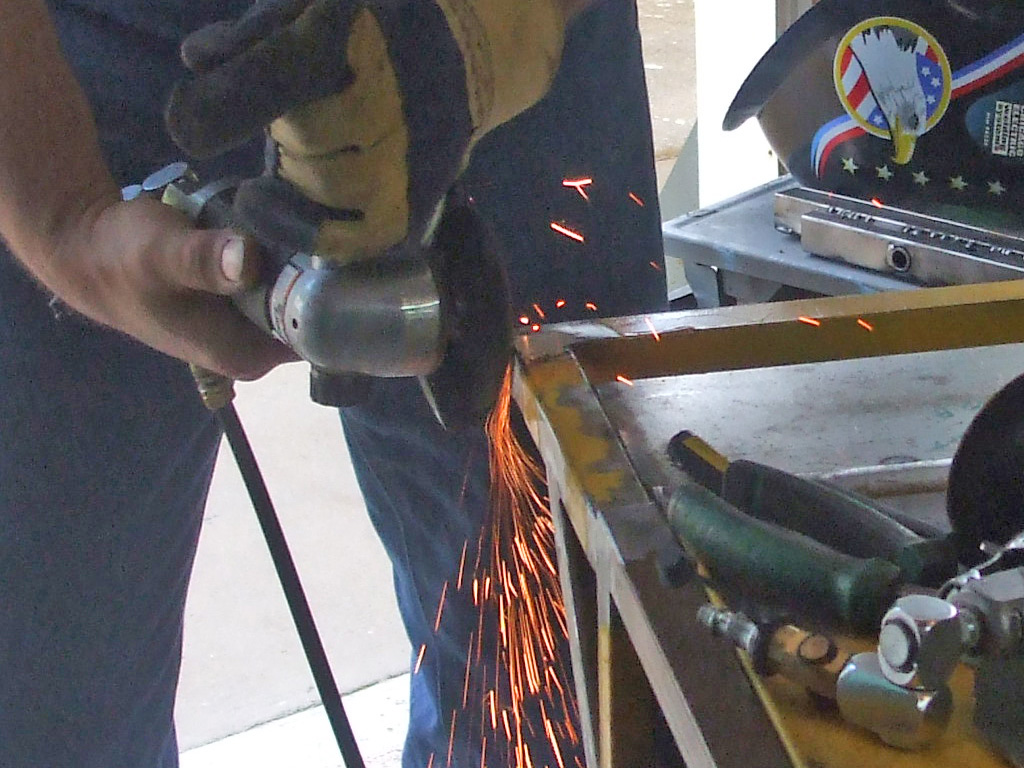
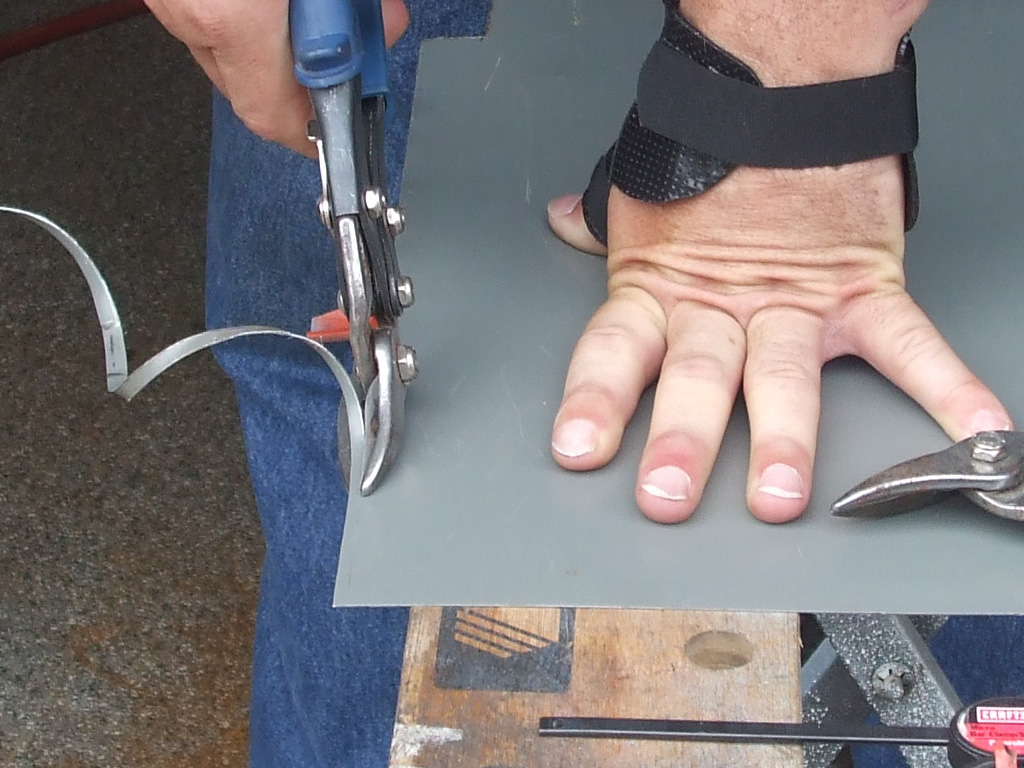
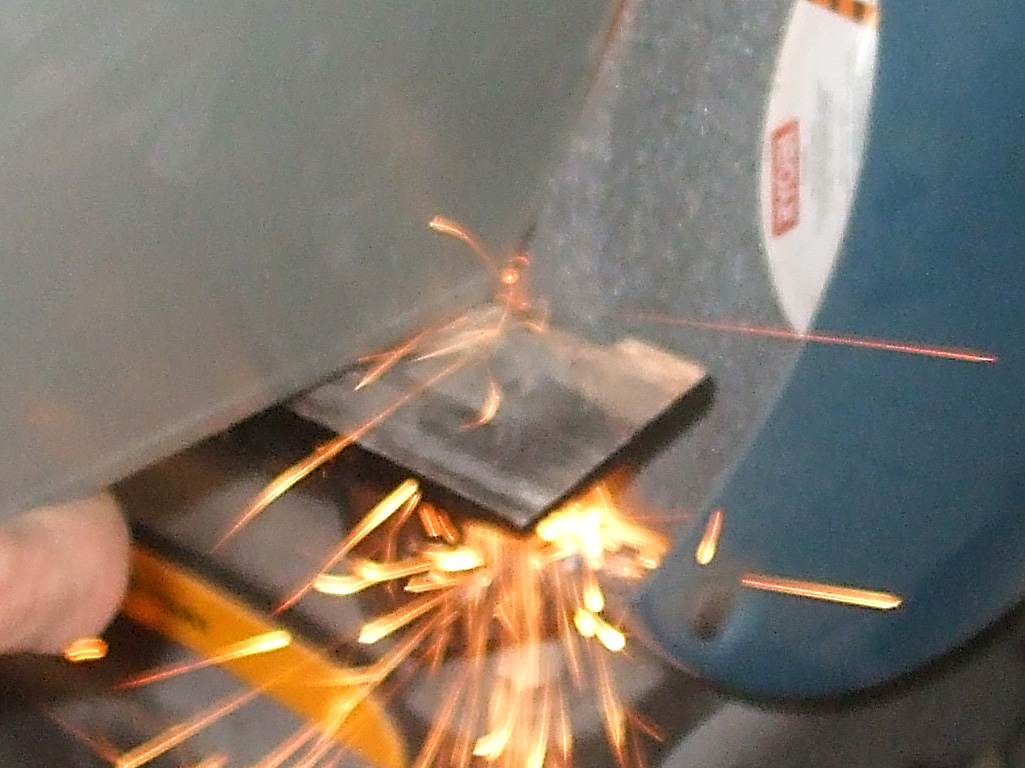
We grabbed a 4" angle grinder with a cut off disk and surgery began. Each drawer had two rails that they slid back and forth on and each had a drawer stop so the drawer could only be removed completely if the front edge was lifted.
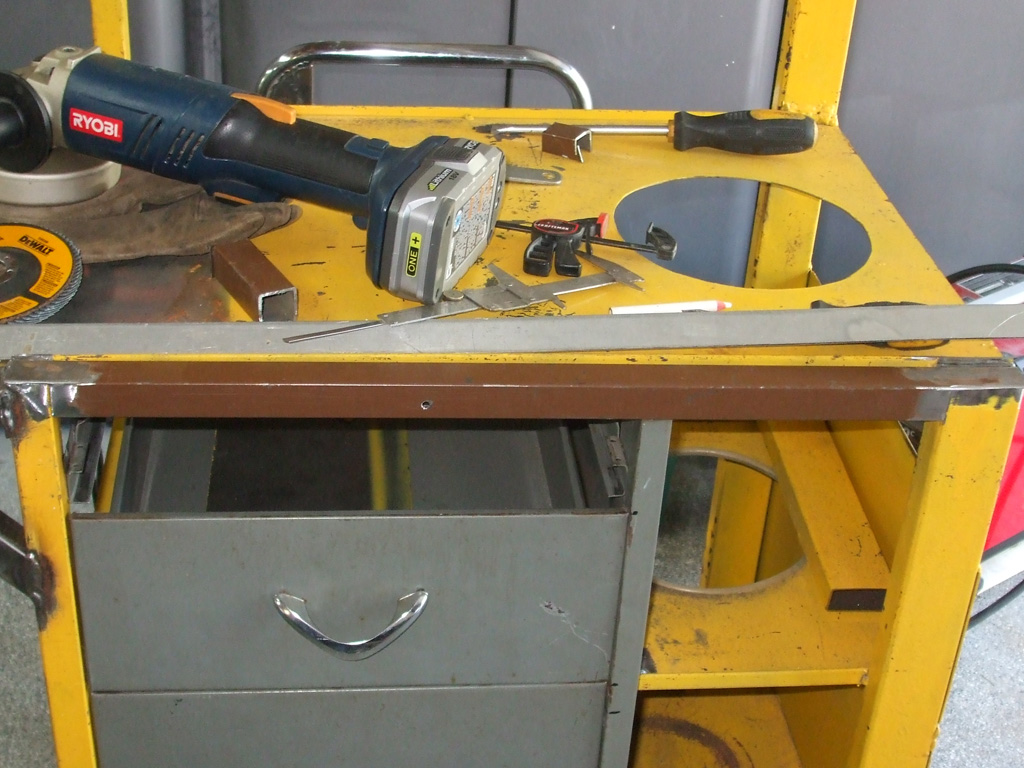
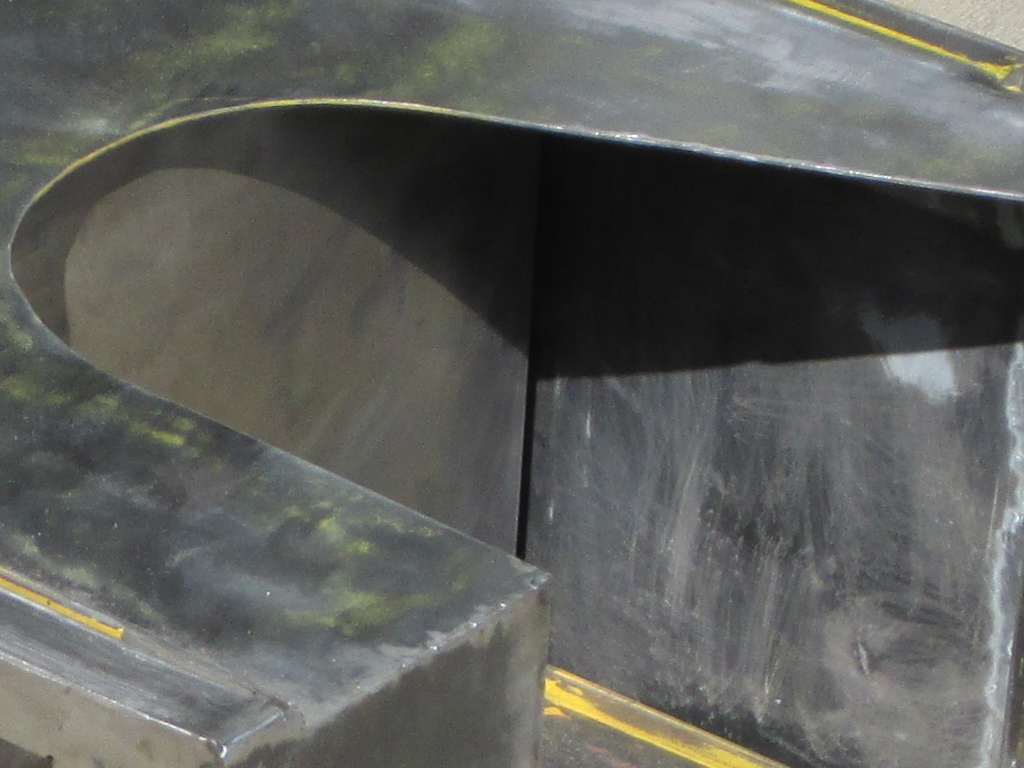
With the handle braces in place, and the extension plate steel welded in, it was time to measure and cut a back panel to close the cart in so we don't just have naked drawer guts hanging out in the breeze. Not sure yet whether or not I'll fill in all the gaps or not between my new extension panel and the original steel, but the front of the welder will have adequate support regardless.

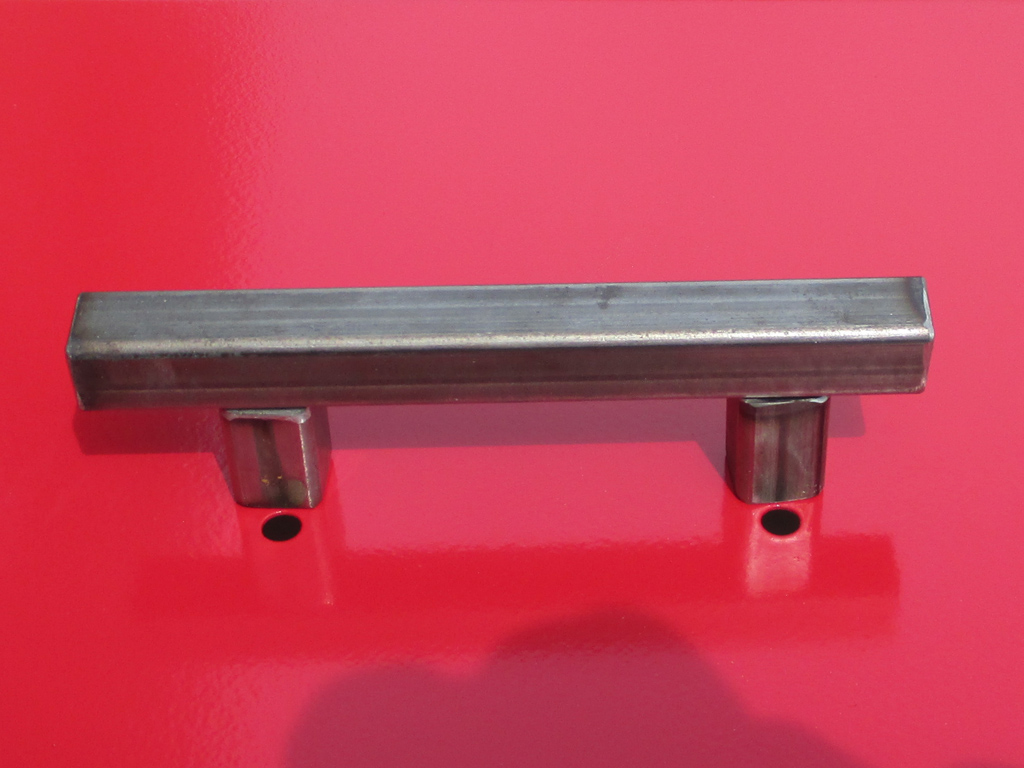
HANDLE BRACE
BACK PANEL
Since most of what I plan on using the welder for will be auto-related, it makes sense to incorporate some auto sourced steel into the cart. To that end I decided to use a side panel chopped out of a van that ended up in that big recycling yard in the sky. As for the make and model of van... I'll leave that up to my more eagle-eyed readers.

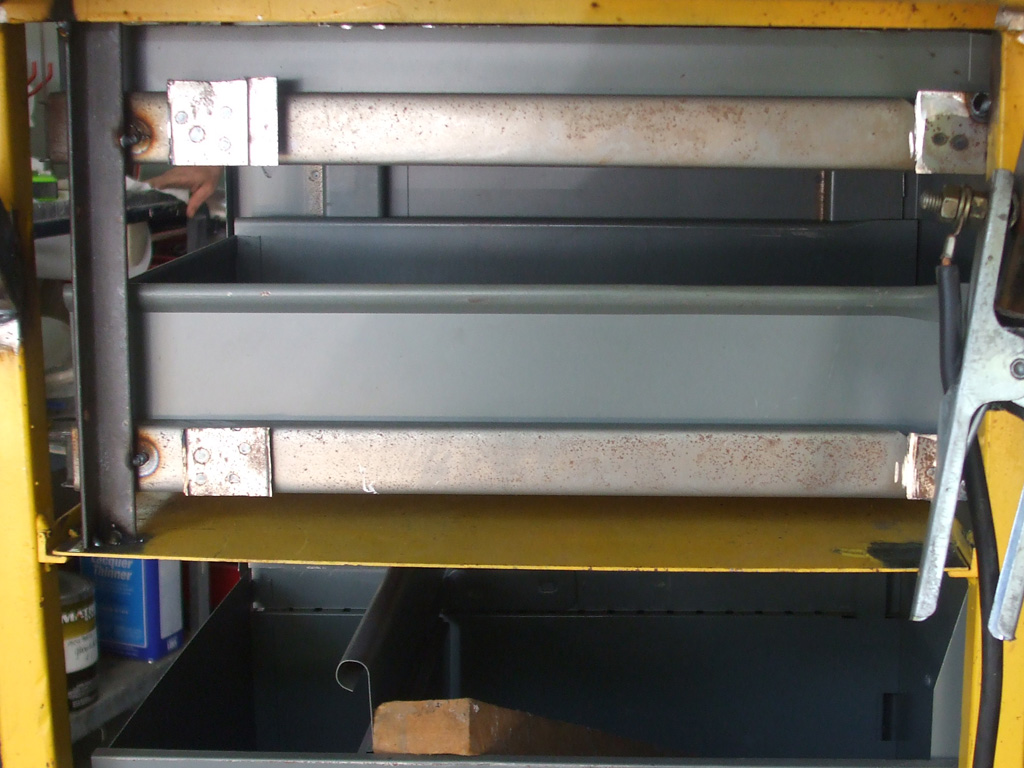
Setting the bottom drawer in place as a mock up only served to confirm our choice of how to proceed. The drawer was almost exactly the same depth as the welding cart itself and the width left just enough clearance for the bottle of gas yet to be purchased. Not only that, but the height of the cart lent itself quite well to the use of the middle drawer as well.
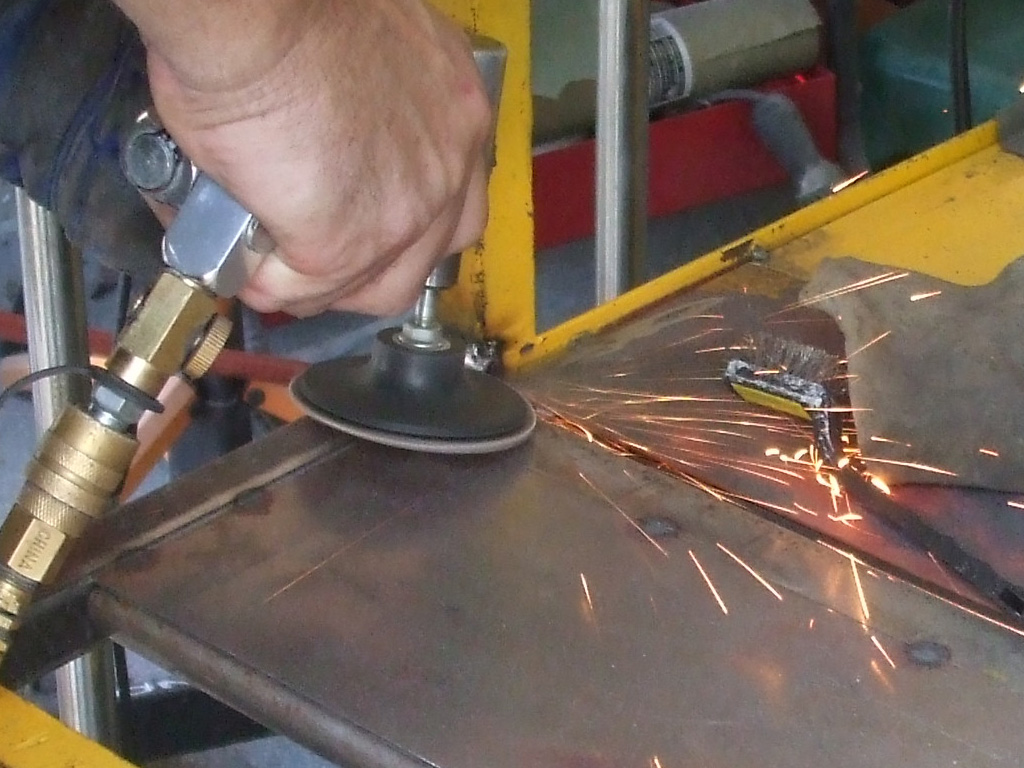
This shot was taken at the end of the day after we'd logged some more hours on engineering the drawers and bracketry harvested from the secretary. What cannot be seen is the amount of time that has gone into making everything fit as closely as possible for a clean appearance. Quite a bit of time was spent using the angle grinder and die grinder to finesse the back panel into it's new home with the smallest possible gaps.
In this "rear" shot, we have already set the spacing of the drawers up against the left upright (as viewed from the front) then tacked a small piece of angle iron to the bottom shelf of the cart and the left drawer rail. The second drawer up is being shimmed into place with a piece of scrap wood as the measurements and test fitments continue.
To the left, we're using welding magnets to hold the side panel cut out of the secretary (complete with drawer rails attached), in place to check the spacing required for smooth drawer operation. We cut one horizontal slot into the side panel so we could slide it in over and around the middle shelf. After much finagling, we finally had both bottom drawers fitting well and operating as they did in their original home in the secretary.
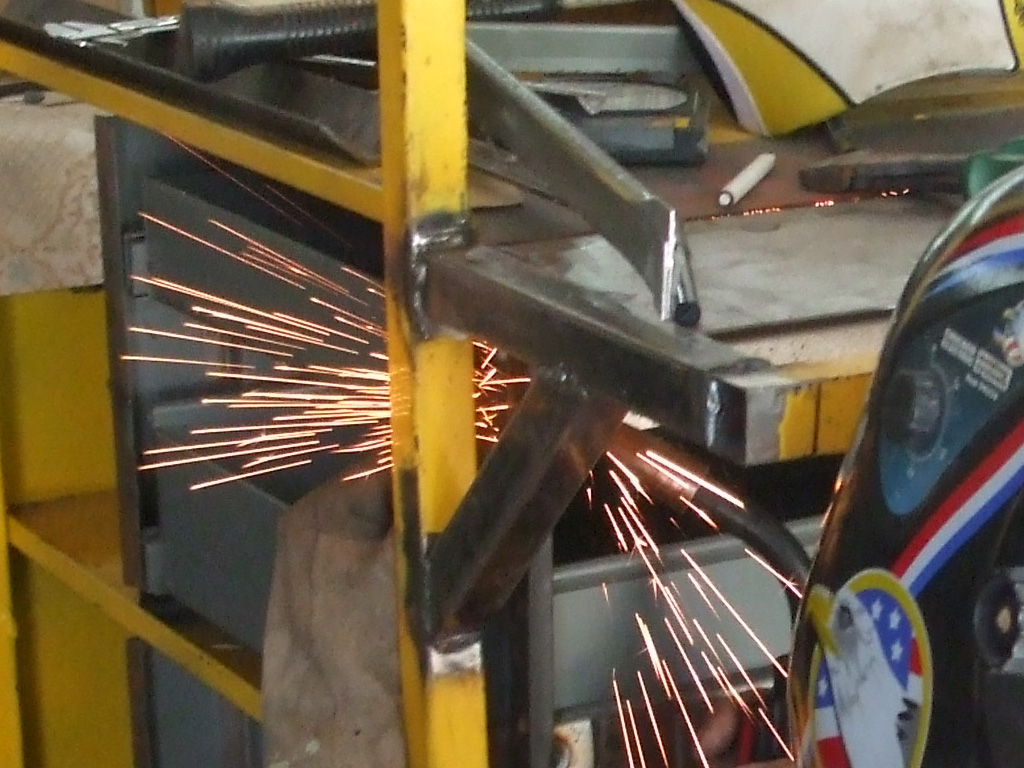
Time for a money shot. All the little tweaks and adjustments are building up to this. Almost seems a bit anti-climactic when you spend hours wiggling adjusting and measuring to have it all come down to a brief ZAP or two and then you can re-check everything to make sure nothing moved in the interim. If it has (and it happened to us a time or two) you grab your trusty Dremel (best for the tight spots we're working in here) cut the weld free and try it again.
Time for a break and that means taking a few more pics. The top drawer hasn't been cut down yet, but can still be used to set the height of the rail that will be used. This angle iron was salvaged from an old fold out bed which means it's really good steel which should provide good strength.
Seen from the front, you can begin to get a feel for how things are shaping up. The top drawer of the secretary turned out to be about an inch or two too high to fit without some extensive modifications. But before we can worry about that, we have to get the left side rails sorted out and the remaining adjustments can be made on the right side.

At the onset, we used a sawzall to hack off the upper front handle in preparation to relocate it to the left side of the cart as viewed from the front. Now, before we can determine how much we will need to trim off the top drawer, we decided to install a top bar for a finished cohesive look.
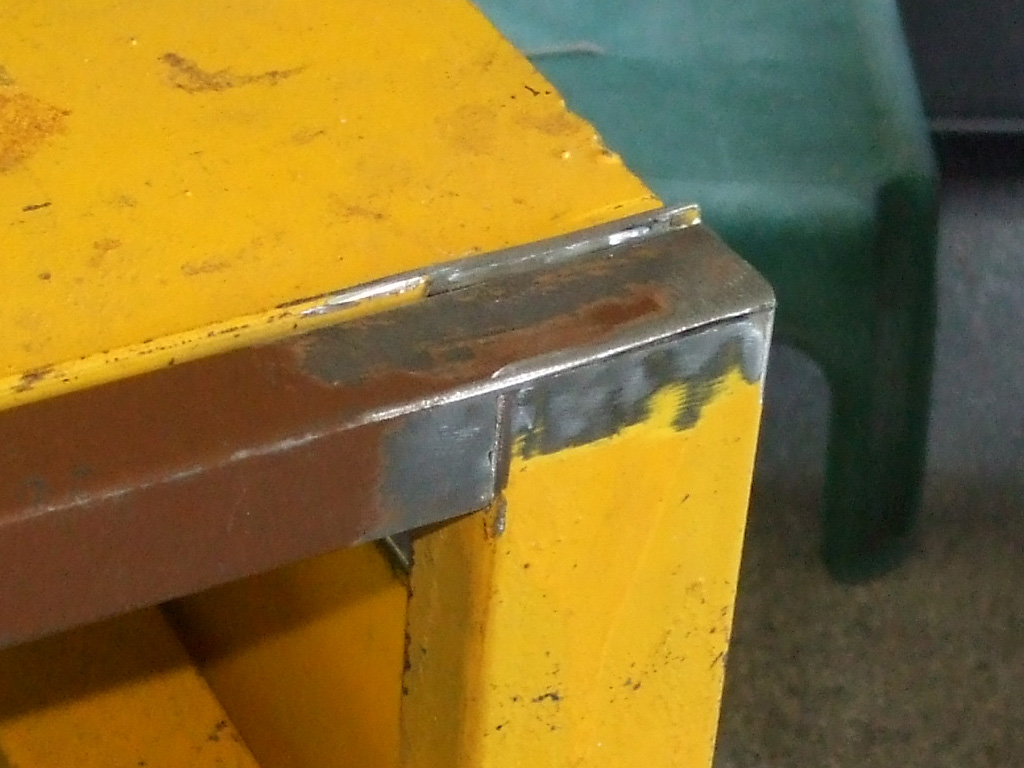
Before we can do that, we need to make a more precise, finished cut where the new top rail (seen here sitting on top of the cart) will be installed. More measuring, more trial and error as we slowly zero in on the finished fit.
It took quite a bit of doing to cut through the welds the previous builder had laid down, but as you can see here, it was time well spent. The top rail has been trimmed for length and further trimmed to fit into the space where it was needed. This will provide a finished look and give us final dimensions for proper sizing of the top drawer.
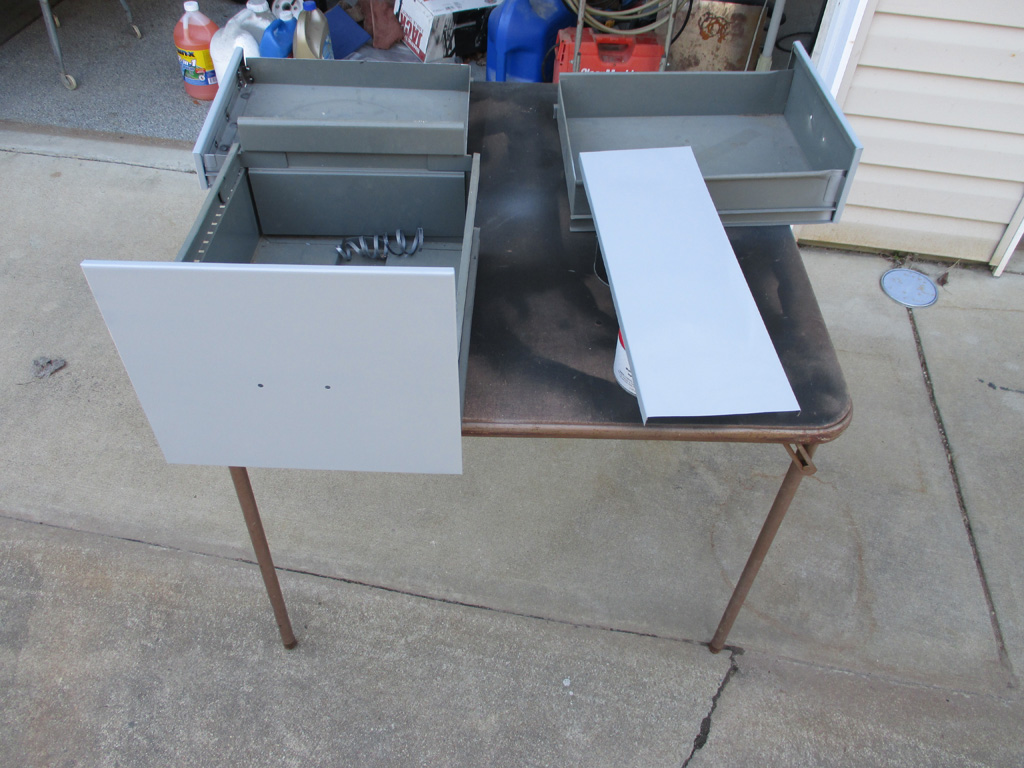
You'll notice that the top drawer is conspicuous by its absence and there's a reason for that. After much careful measuring, we cut the front of the drawer free from the body and then trimmed off about 3" from the top of the drawer itself.
That meant losing the curled upper edge that lent strength to the thing, but I'm not sure I'm good enough to re-weld the curved part back in without warping the hell out of the drawer, so we left it as is for now. With the drawer freshly sectioned, we then trimmed the drawer front to match. That was the easy part. Now for the really difficult fun part... re-attaching both modified sections back together and have everything fit properly in the bargain.
I have to admit, my welder looks a bit forlorn and forgotten sitting on the small dolly that is its temporary home as the build continues. I thought this bit of fittment deserved its own couple of pictures. As before, more measuring, more trimming, more test fits to get to this point, with an assortment of magnets holding everything in place as we made various adjustments.
LEFT SIDE
RIGHT SIDE
Of course the right panel salvaged from the secretary had to be trimmed as well for everything to line up properly. More importantly, the top drawer has been sectioned to fit into its new environment with the top bar in place. I'll also have to fill in the holes for the handle, then drill new ones (centered vertically and horizontally) so the end product will look as though it was never altered.
This was a toughie. We used triangle shaped welding magnets to hold the front of the drawer to the bottom, which gave us some wiggle room. This enabled us to tap it a bit this way or that until we had the desired clearances.
That may sound easy, but we now had to make this drawer fit with the other two in a new location with new steel upper trim piece we fabricated. We elected to cut off the bottom edge of the drawer, since it's far less likely to be noticed when we're done and it left us with a factory edge where it was visible. More measuring, more trial and error until finally we had equal clearance on all sides. Finally we nailed it down and tacked the two parts together in their new configuration.
The tricky part was lining up the drawer base, the drawer front and the piece of scrap angle steel we were using to join everything together. Each time we thought we had it nailed down, some piece or another would shift and we'd have to begin again.
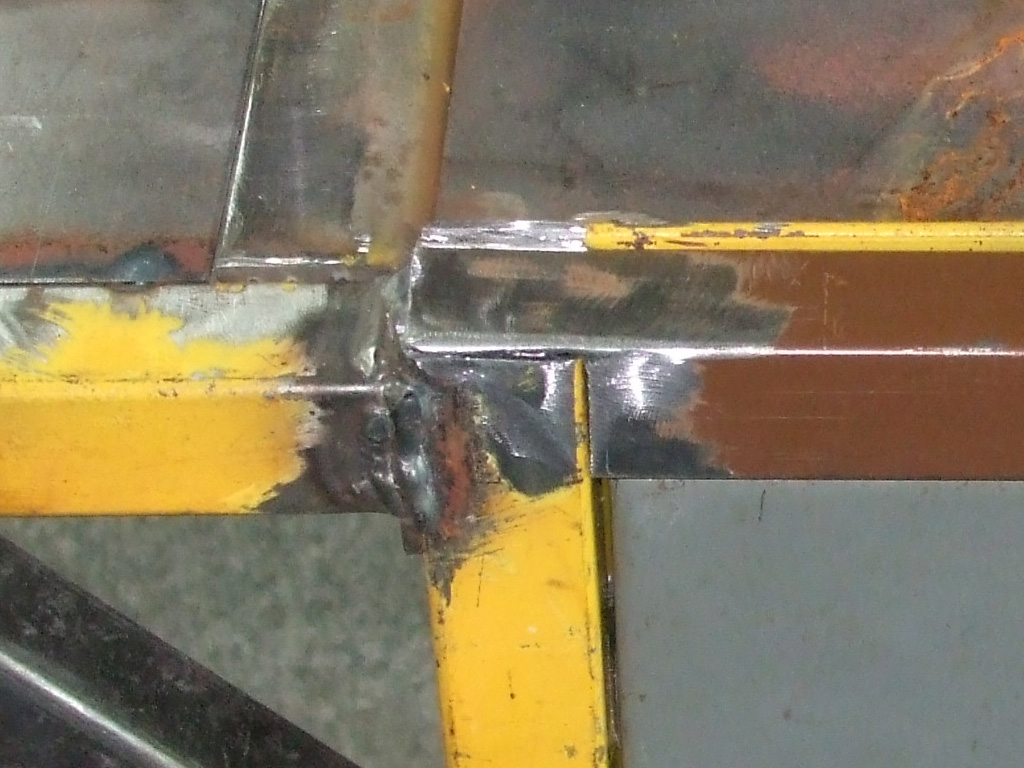
With the top drawer squared away for the moment, I took some time to cleanup some of the original builder's welds on the handle. Some of his/her welds were not square and there were even some dents in the steel (possibly from hammering), so I added some additional welds to fill in the worst depressions in the steel.
Naturally once I'd laid down enough wire I needed to make everything smooth again. This will be a hybrid cart in more ways than one. The OB was obviously a newbie and most (if not all) welds were left as is, where I try and make mine as smooth as possible.
Since we added a new top rail on the front to finish off the drawer opening and I ground those welds smooth, I decided to dress up the OB's welds while I was at it. The old "in for a penny, in for a pound" philosophy at its finest.
When all is said and done I am going to paint this thing and there's little sense to just slapping a coat of paint over half-baked or globbed up welds. I want to do it once and do it right. That way I can press this into service and not look back.
I had to tip the cart up on end to reach the area where the uprights meet the handle supports. There was no time like the present, so I played with the heat and wire speed settings as I move onto different joints (and thicknesses) in the steel. After gaining more experience I guess you get a feel for which adjustments to make as you move around a given project.
I think I'm still at the "test it on a piece of scrap steel first" stage. Maybe someday I'll be good enought to make changes on the fly. For now though I have to set up things on a hunk of scrap, then move to the same thickness of steel on the project.
As long as I was dressing up the welds on the upper handle, I figured I may as well cleanup the support welds too. I spent a bit of time building up welds, then grinding down the excess to make everything look as professional as possible. Probably overkill I know, but if it's going to be mine... why not?
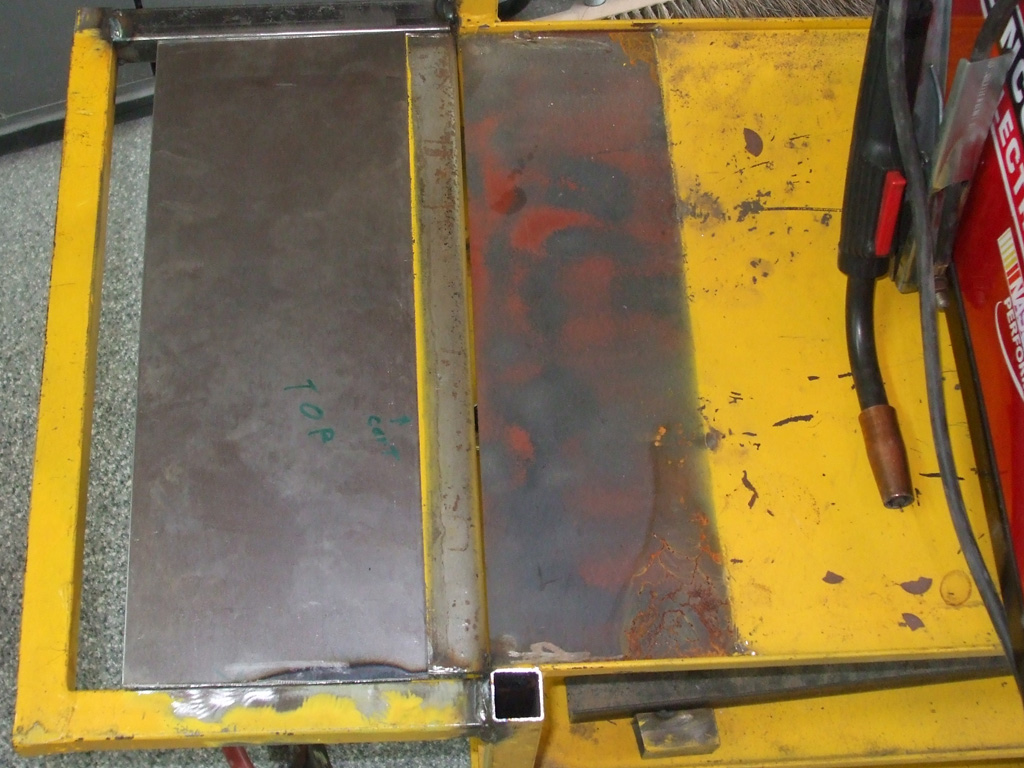
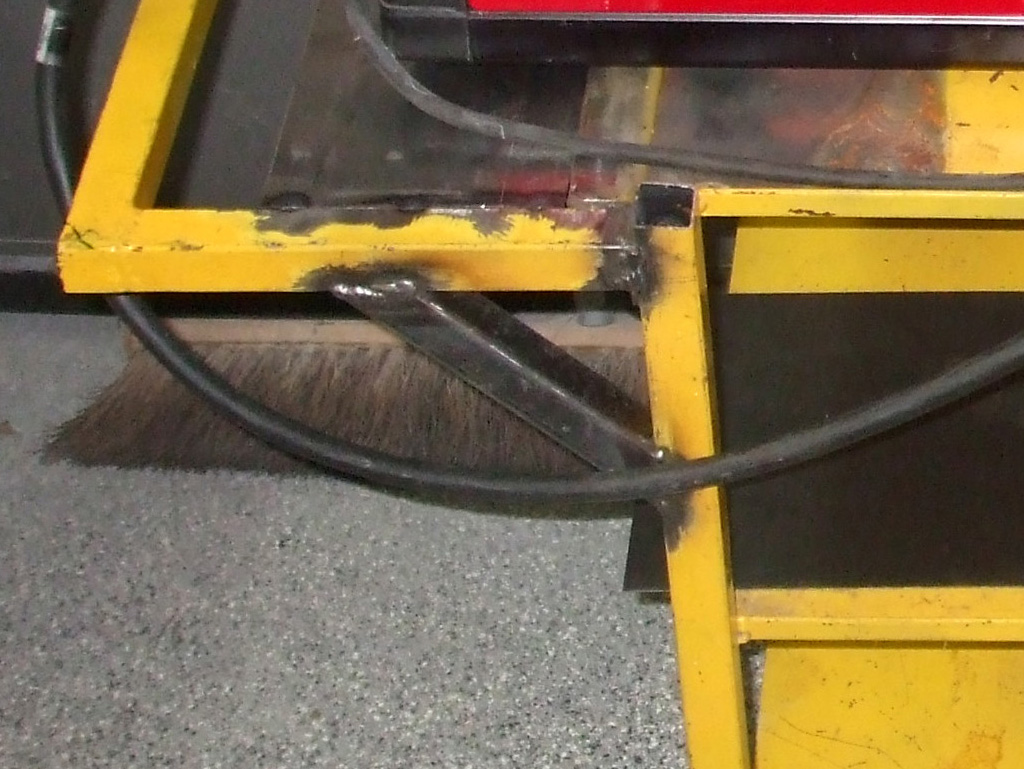
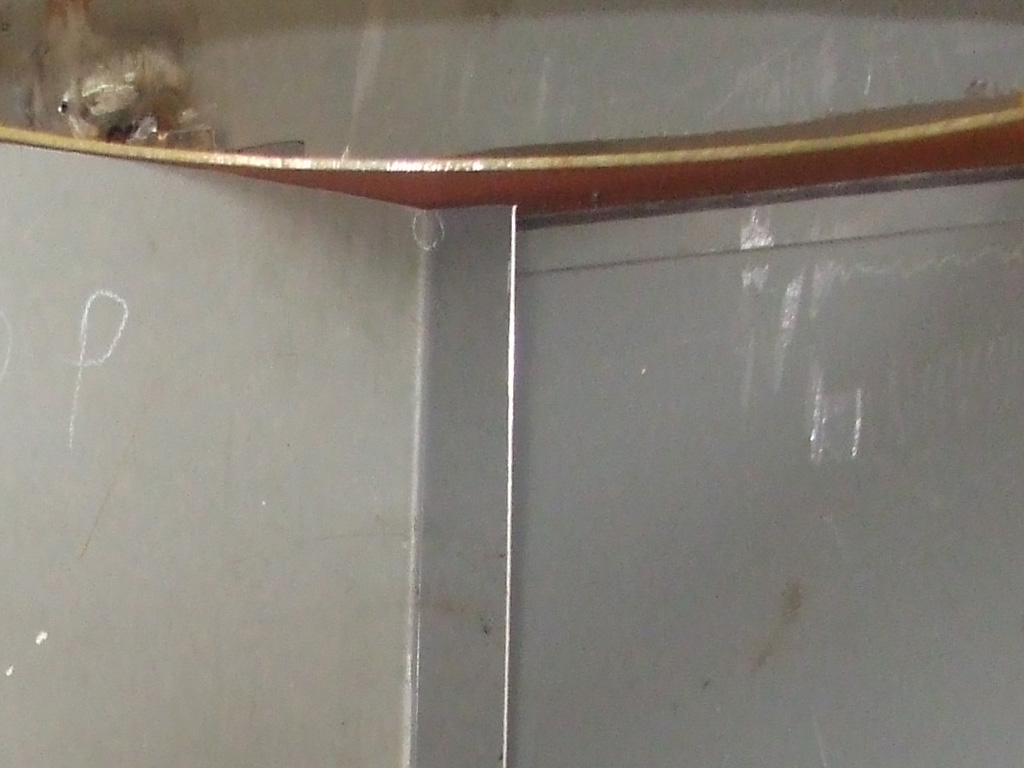
The reason I was spending the time cleaning up the handle support (as well as the upright/caster area) was because of this. Closing off the end beneath the handle will accomplish two things. First and foremost, cover up the drawer rails, supports and some less-than-stellar welds. Secondly, provide an area for cord storage reels... at least at this point in the design. Check out the high-tech tools I'm using for this stage of fabrication. Old-school baby!
My current idea is to take some small wheels, cut them in half (resulting in two semi-circles) and creating some cord storage reels. I may have started out with wheels that are too small for the amount of cable that I'll need to store. But I had them laying around, so they'll be my first choice. If that doesn't work out, I'll hit the flea markets for a couple of wheelbarrow wheels.
The first of several test fittings we went through. We couldn't make notches for just the supports due to the size and stiffness of the steel we're using so we cut a lengthwise slot into each top ouside edge and slid the panel into place. To pretty things up a bit, we cut two small tabs of steel out of the leftovers and will weld them into place when we're finished. Just laying the panel in place on the cart improves appearances 100%.
Once I had the heat and wire speed dialed in (the chart on the inside of the welder door is a good tool to get you in the ballpark), I began working my way around the circumference of the newly fabricated end panel. Since we're basically converting this from a "utility cart" style to more of a "tool cabinet" style, this will give this end of the cart a more finished appearance.
FRESHLY TACKED
END OF DAY
Of course to really do this thing justice I probably should fill in all the gaps and then grind everything smooth for a more refined look. Or, I can leave it like it is for a more industrial, "slapped it together from scrap pile bits" kind of look. Then again, if you look at it from the "practice makes perfect" school, I really should do it up right for the experience and feel of using the welder. The jury's still out on this one.
With the drawer situation sorted out, we pondered the open space where the original builder placed a bottle of shielding gas. The open shelf space would provide storage for aerosol cans, welding oil cans, anti-spatter products, you name it. But how to finish it off and make it usable? After kicking around a few ideas, a door seemed the simplest solution. We took a measurement of the space between the braces (which was not square by any means), and using another section of steel from the defunct steel secretary, began fabrication of a door. From scratch!
The trick is to allow enough extra steel (beyond the opening measurements), to fold back at a 90* angle, to provide strength and a finished edge. If you look closely, you'll notice our previous effort (laying on top of the cart as we're scribing a new panel), which was slightly off the mark and too wide for the opening on the cart. At this point we've got the width right and are working on the top edge fitment.
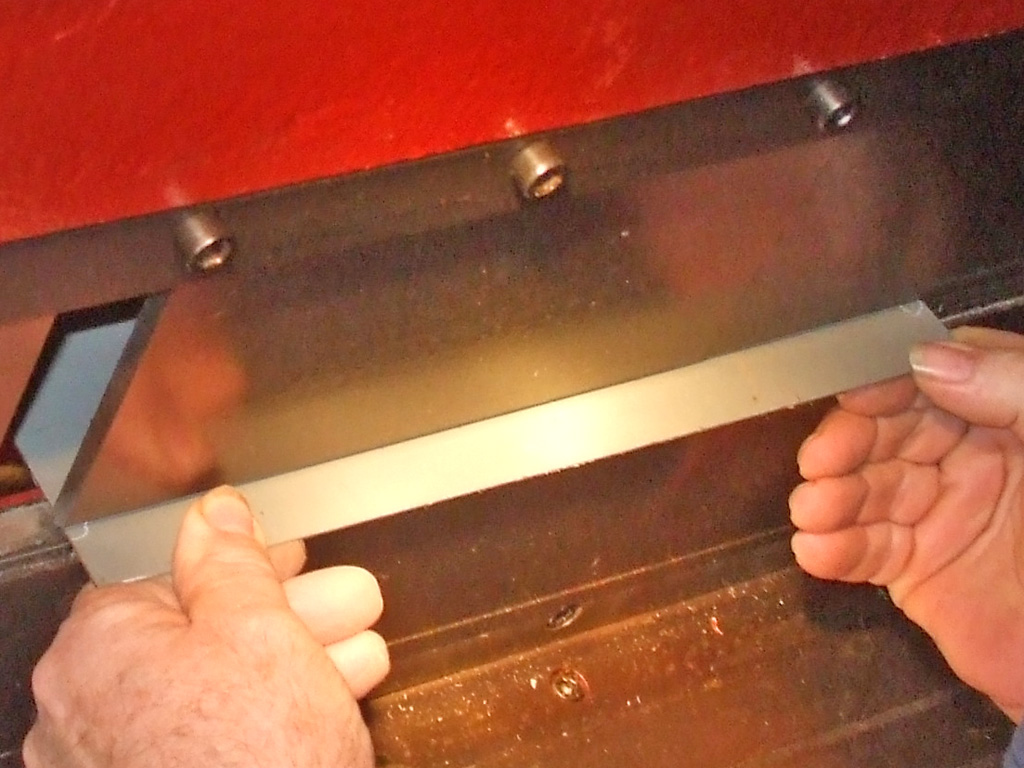
When you've got a section of sheet metal that needs to be manipulated, where accuracy is a must, it's hard to beat a sheet metal brake. The nice thing about this tool is its ability to create long, straight lines for both cutting and bending purposes. In the first shot (below left), we're using the shearing function to cut a straight line on our "cut" marks which we'd laid down earlier.
SHEARING
CREASING
With the steel cut to the proper size, it's time to use the 90* bending dies (above right), to form a crease along the "bend" marks we'd made on the steel. The only way I have of coming close to this (albeit a much cruder effort), is to place metal in my vise and beat it with a hammer. That only gives you a half-assed solution and seeing this baby in operation... there's really no comparison even with a budget-priced unit.
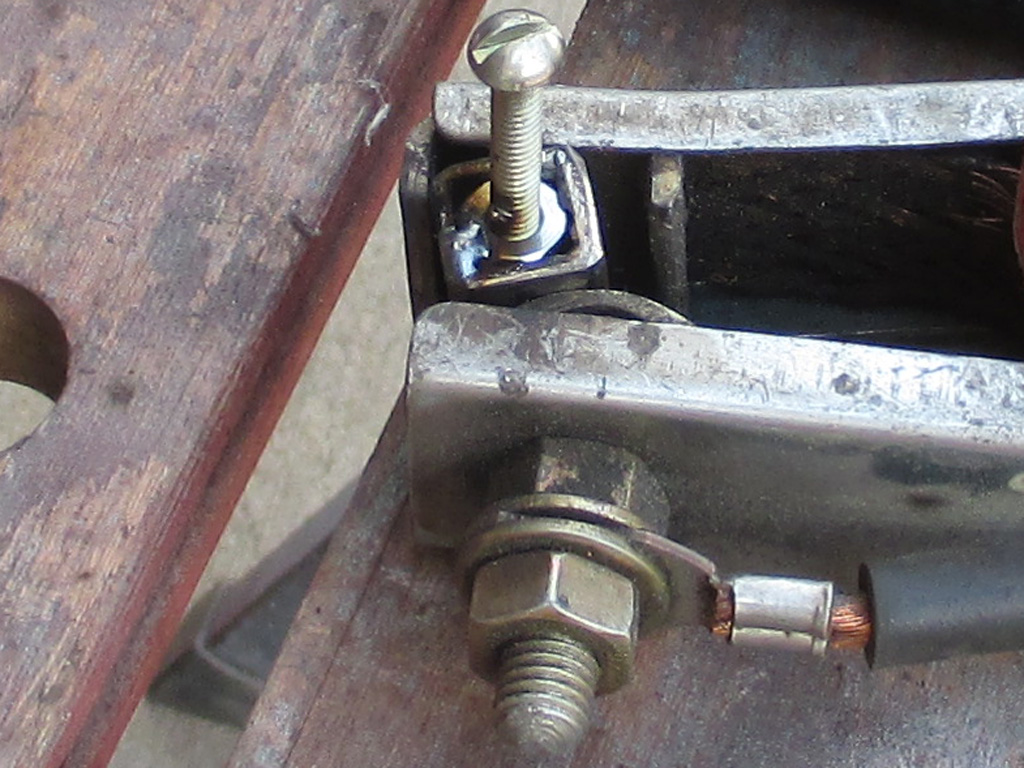
In order to provide enough space for the flush-mount hidden hinges we picked up at the home-improvement center, we needed a spacer. So it was back to the steel secretary carcass to harvest one of the many reinforcing beams they built into the unit. Ah, the many advantages of never throwing anything away that might prove useful in the future.
This shot shows us drilling the necessary holes to mount the hinges to the brace (beneath the brace, the section of sheet metal we removed it from by drilling out the factory spot welds), with the screws that came with the hinges.
Then we cut it to fit, drilled holes for the hinges and welded the brace to the door. The brace will of course provide structural support, but was really only needed to space the door forward (from the hinge mount on the side panel) to provide enough room for the door to open.
Here's another test shot to make sure everything lines up properly and that the new door opens and closes without any interference. Yes, the upper brace does not (at this point anyway) go all the way across the door. I'll fix that up in a bit, the main thing was that everything lined up the way we wanted it to and is fully functional.
Once we're sure we've got everything working as it should, then we'll go back and make it pretty. The bottom brace that spans the entire width of the door is a bit off kilter as well, so I really should pop the welds I made and re-weld it back in again. Purely an asthetic move, but it will probably be the first thing someone else (who hasn't been staring at the same mass of metal for months), notices.
And keep your eyes on that side panel partially covering the gas bottle opening... its hours are numbered!
After attempting to lift the bottle of shielding gas up and over the cart (as the original builder designed it), it became rather obvious that a re-design was imperative. Not knowing the original builders intent, it's hard to tell why he/she built it the way they did, all I know is... it isn't working for me.
Once we decided to modify things, the first order of business was to cut through the welds holding the side panel to the uprights of the cart. Once we had that piece free, we trimmed a vertical patch to the same width as the piece we left in place, so when all is said and done we will have a cohesive design and not have to lift the bloody tank 2 feet off the ground to get it into the cart.
Also visible from this angle the patch brace I am going to weld into place to give the door a more finished semi-professional look. As I've previously established, I tend to be rather anal about such things, but the older I get the more I realize this will eventually belong to someone else after I'm gone. If I'm going to leave a legacy, it might as well be halfway decent... right?
Here I'm conducting one final test fit of the patch panel prior to firing up the welder and making things permanent. Also visible in this shot are some of the tools I've been using, as well as the tack welds holding the drawer support panels in place. One of the reasons the top drawer only fits properly when you push on it is due to the fact that the back end of the side panel is still flopping around like a wet noodle. What we've got to do (before the back "dress up" panel is attached) is fine tune all these little things so the drawers all function properly.
I think at the moment I'll probably fill in the spot welds on the seam of the vertical patch so it at least looks (from the outside anyway) as if it were a single piece of steel instead of two pieces patched together. I guess I'm going to have to make up my mind on which finishing method I like the best. Right now I'm content to just get the thing operational and useful, but pretty soon I'll have to make a decision and stick with it. Time will tell I guess.
One final shot to closeout this session. The vertical patch has been welded into place and the welds ground slightly. I'm still debating whether or not to grind everything flush, or semi-grind the welds to create an industrial look for the cart. At this point, I've been rather "bi-polar" about the whole thing, grinding some welds perfectly smooth (easy to do once you're "in the zone" so to speak), while leaving others more roughly finished.
I think at the moment I'll probably fill in the spot welds on the seam of the vertical patch so it at least looks (from the outside anyway) as if it were a single piece of steel instead of two pieces patched together. I guess I'm going to have to make up my mind on which finishing method I like the best. Right now I'm content to just get the thing operational and useful, but pretty soon I'll have to make a decision and stick with it. Time will tell I guess.
With the door pretty well sorted out, it was time to add a finishing touch or two. Now I don't know about you, but whenever I put something into a cart like this and there's nothing to keep the items in place, the next time I reach for something I have to hunt it down. With no back to the door compartment, there'd be nothing to contain whatever I set there other than the tank of shielding gas itself. If you're making a cabinet, then it's gotta have four walls to keep all your stuff in place. With no other logical choice, we decided to close the compartment in by fabricating a couple of back panels.
To that end, it was time to revisit the secretary carcass (now little more than a collection of sheet metal of varying sizes), and scrounge up a couple of pieces of sheet steel. As with the door, there was measuring, marking and cutting to be attended to. We used our angle grinder for the rough cuts and then it was on to the metal brake for the final cuts and creases.
As precise as we tried to be, there was no getting around the fact that the cart is out of square. It's close... but not exactly square. This means that despite our best efforts, we still have to employ our grinder in order to finesse the new backing plates into position. Not a big deal really, since we'd already gotten quite close with our measurements.
As difficult as it is patching in to another person's design, this phase went quite smoothly with only a small amount of grinding required before the panel slid into position. As we did with this one, we repeated the process for a duplicate panel for the upper shelf section, so by days end both shelves were closed in with backing panels. In our next session we'll probably weld these babies into place. More to come.
Having lost much of December to the holidays and all of January to various ailments and maladies, I finally managed to regroup and get back in action. Only took me 'til mid February 2014 to accomplish this feat, but better late than never as the saying goes.
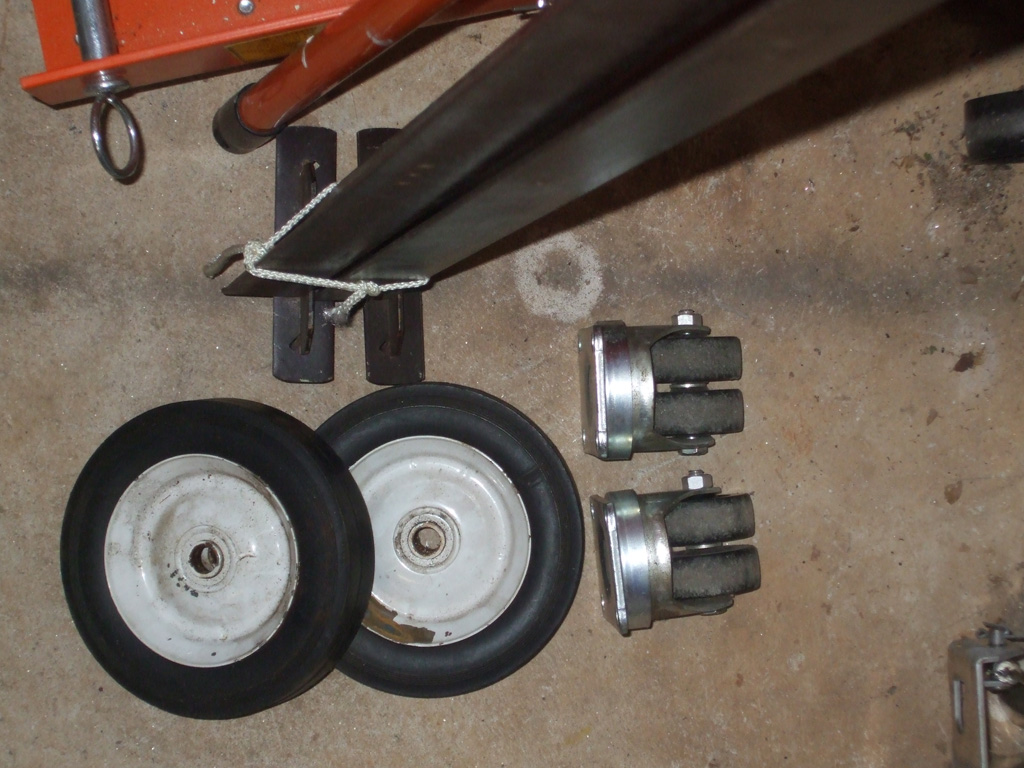
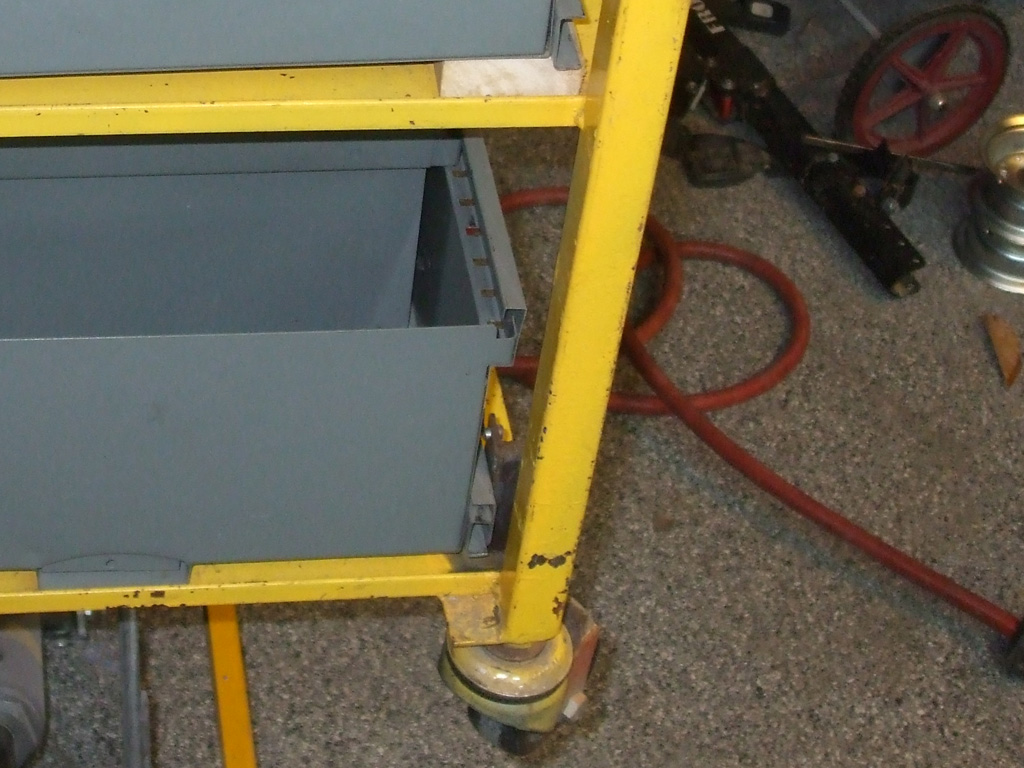
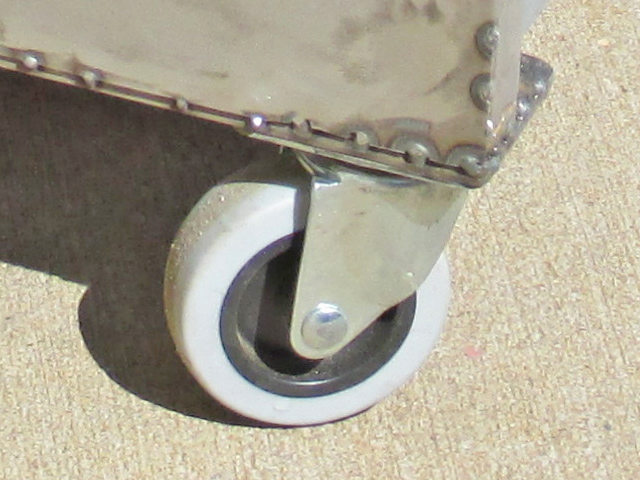
After much deliberation (and the fact that at least one existing caster was bent), it was decided that all four casters would be replaced. Once we got all the old casters off, we cut off the nuts used to mount them because the new casters had flat plates for mounting purposes. Naturally this meant we needed a nice flat, level surface upon which to mount our new casters.
GRINDING NUTS
ALL GONE
Step one was to grind off all the old nuts that had been used as mounting points for the old casters. Step two, smooth off the area as best as possible. Then, with perfectly smooth somewhat smooth surfaces at all four corners we tackled the wobbly cart. Basically, we had two high corners (diagonally), and two low corners. We experimented with some shims to find out what thickness we would need to banish the "wobbleys" for good.
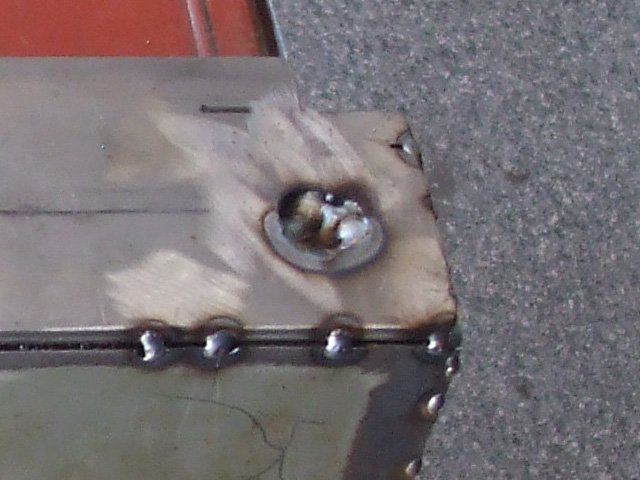
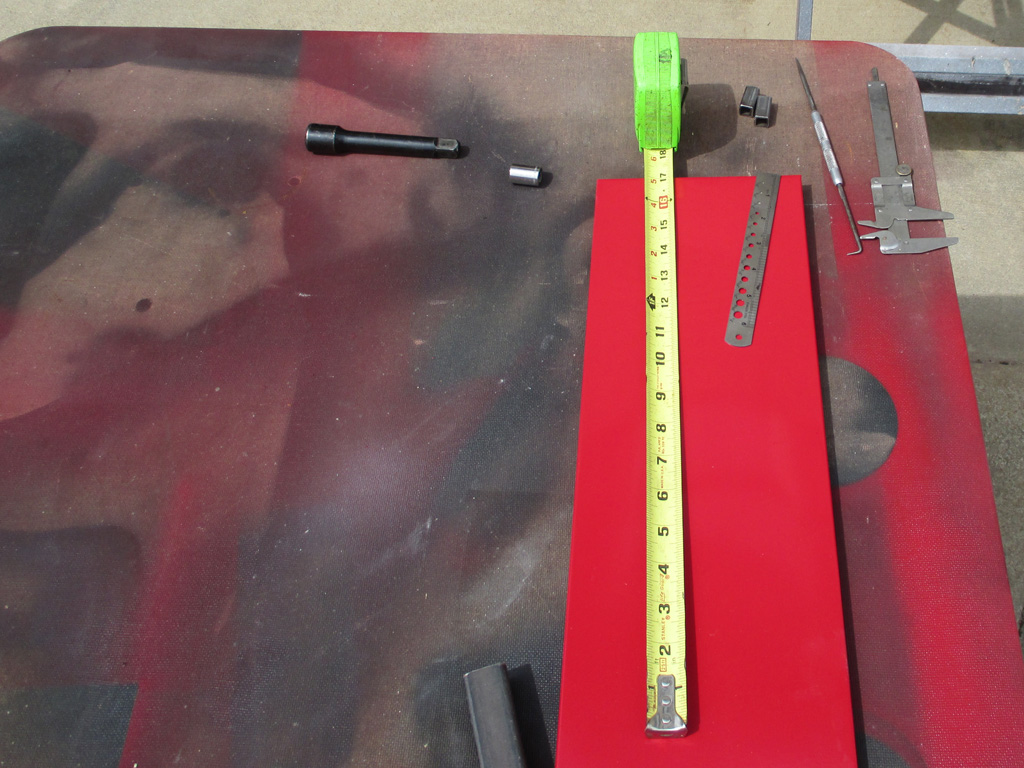
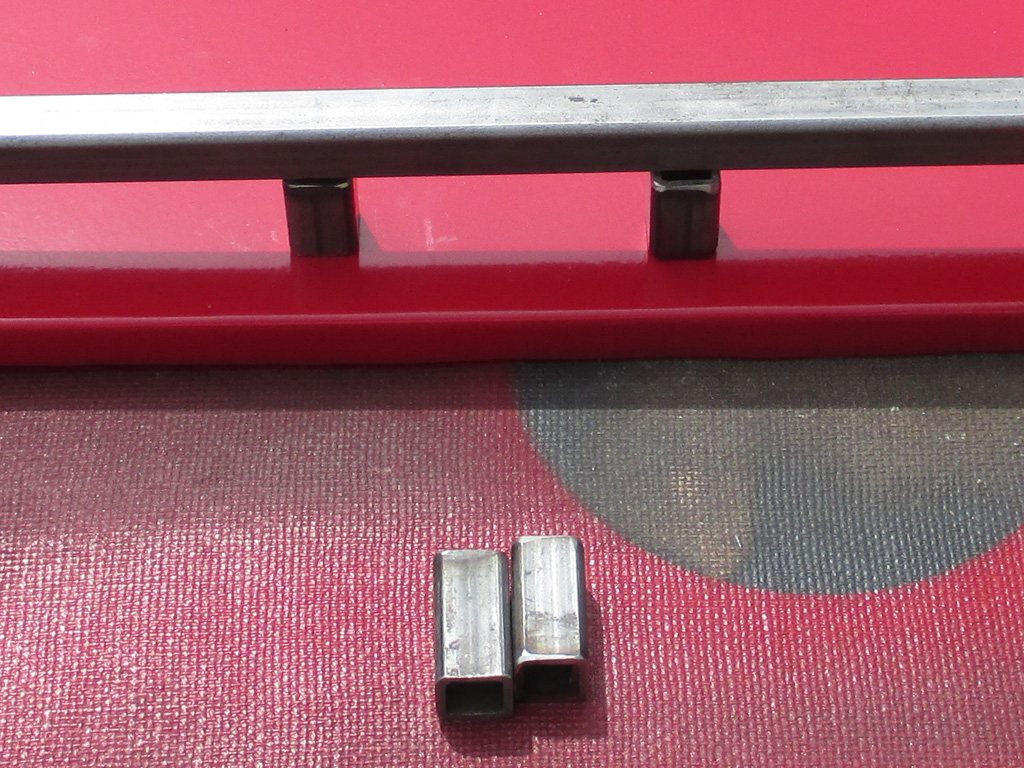
Here's a shot of our reinforcing plate which we used to give us a flat plane to mount our casters to. The right front corner in this shot has had a 1/16 shim inserted beneath it to square up the casters. A hole drilled in the center of each end of the 1/8 plate stock (centered over the original square mounting pads), gave us the opportunity to practice some "rosette" welds. The tacks along each edge were to match the existing design, while the rosettes were structural.
For cord storage, we sliced and diced some Harbor Freight hand truck wheels I had laying around. I knew I wanted a round shape, but nothing so heavy it would warp the sheet metal we'd be welding the wheel halves to. We originally planned on using a wheel half for each, but the lower half would've been wasted, so we cut each half in half giving us 1/4 wheel sections.
LOCATIONS MARKED
WELDED IN
We used welding magnets to hold the wheel slices in place as we experimented with different locations. A triangular arrangement seemed to work best for the ground lead and torch hose/cable assembly so we marked the locations and sanded off the old paint. Then we up-ended the cart, welded them in place and checked everything when we were finished. Not too shabby!
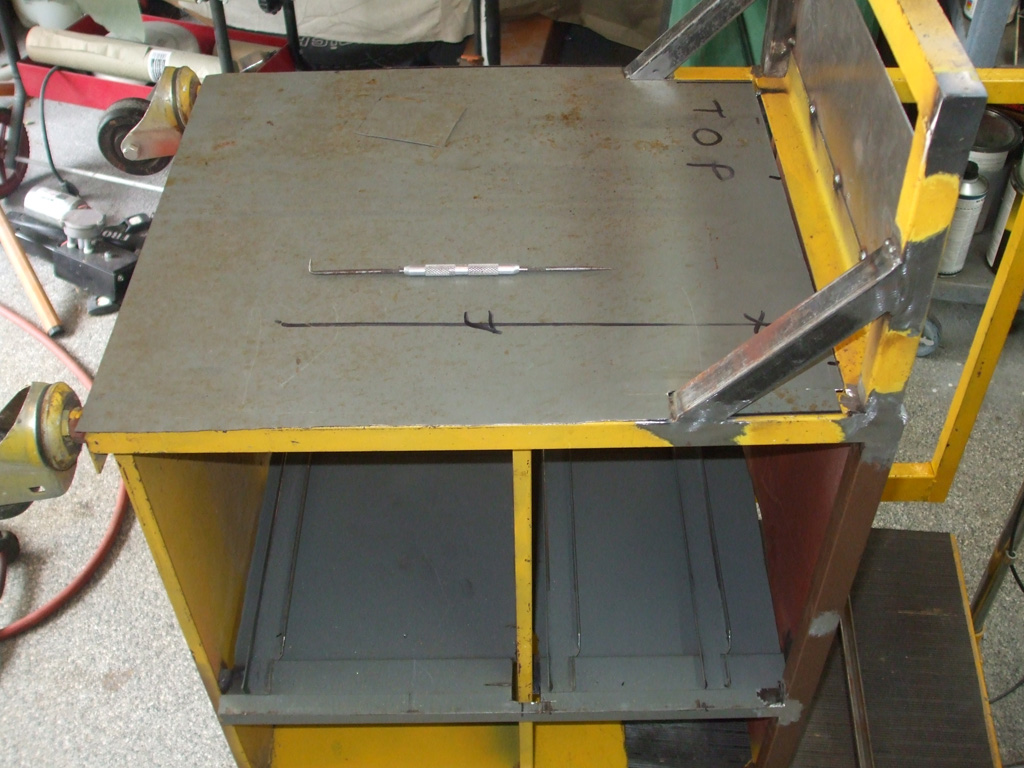
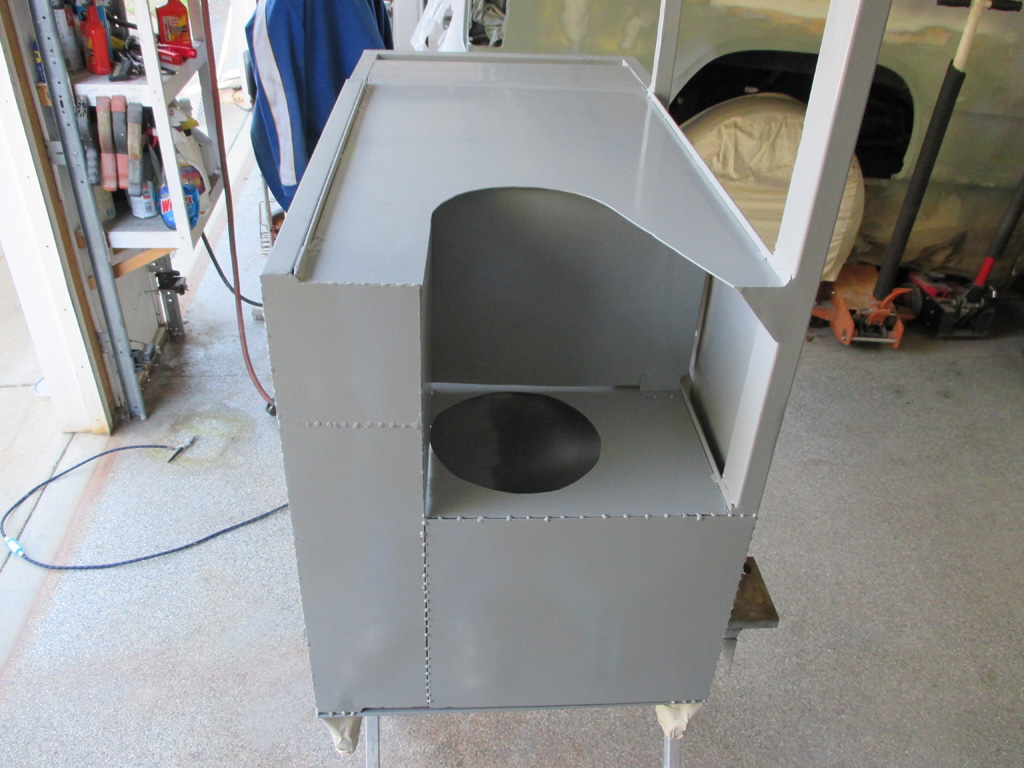
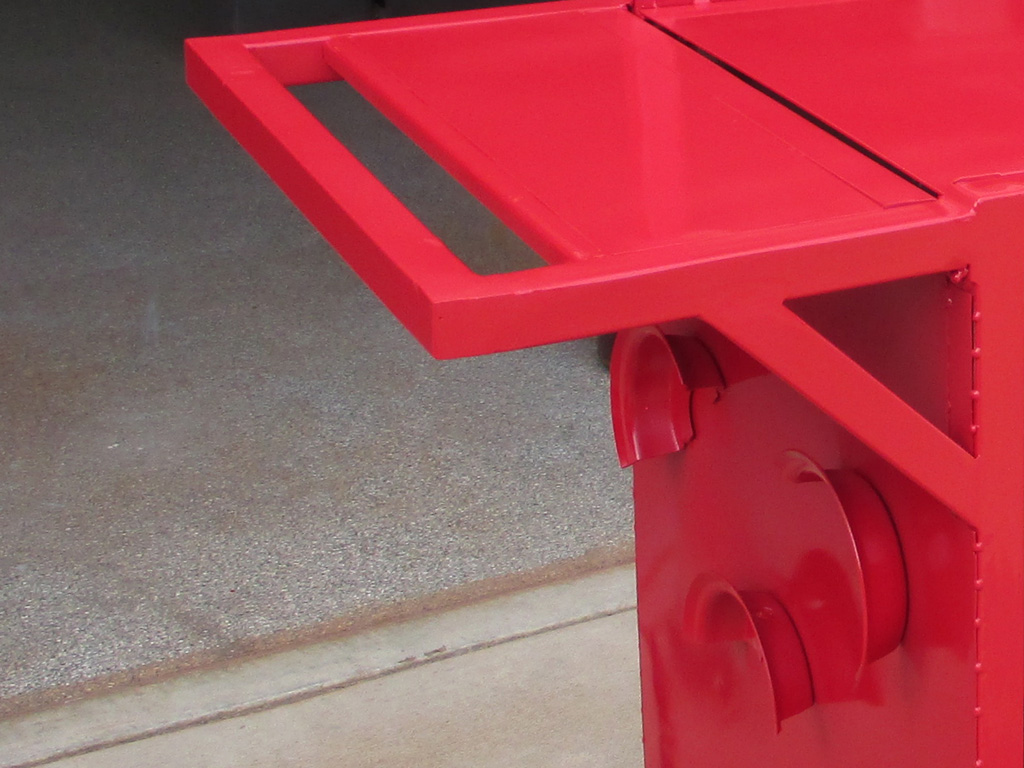
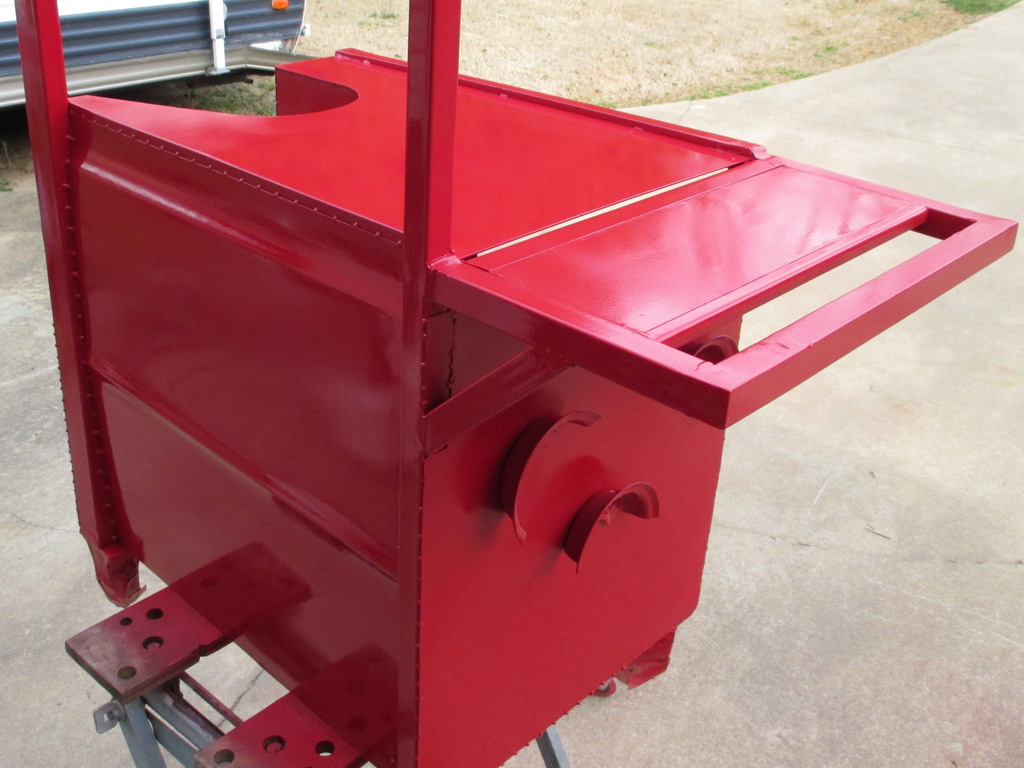
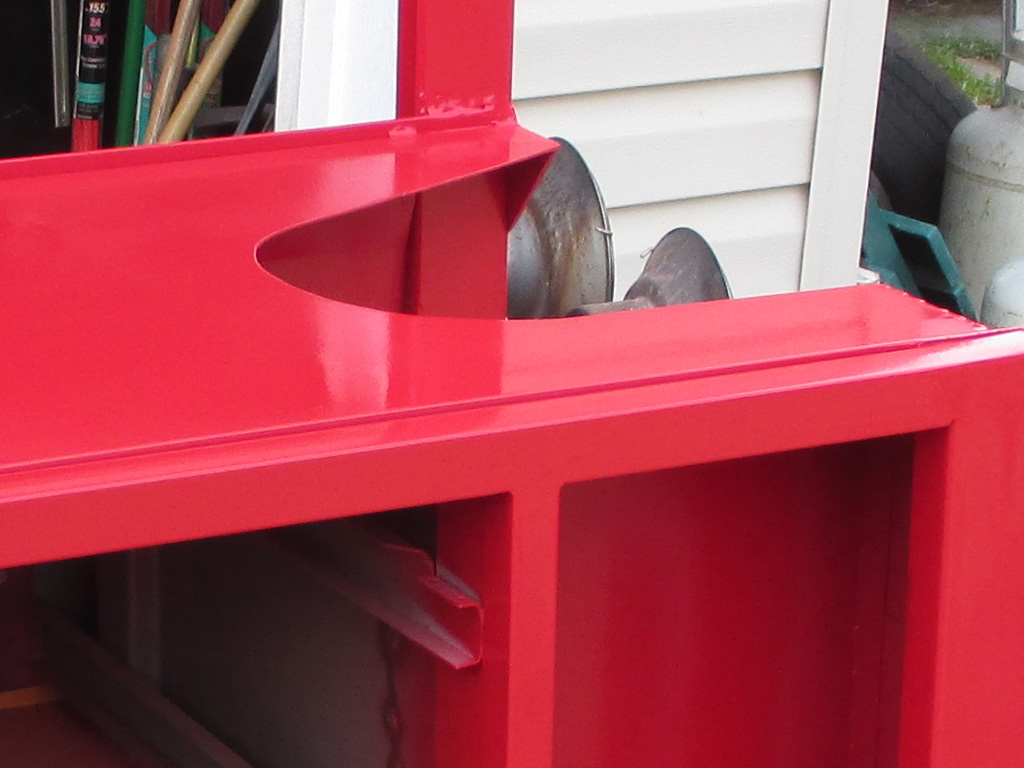
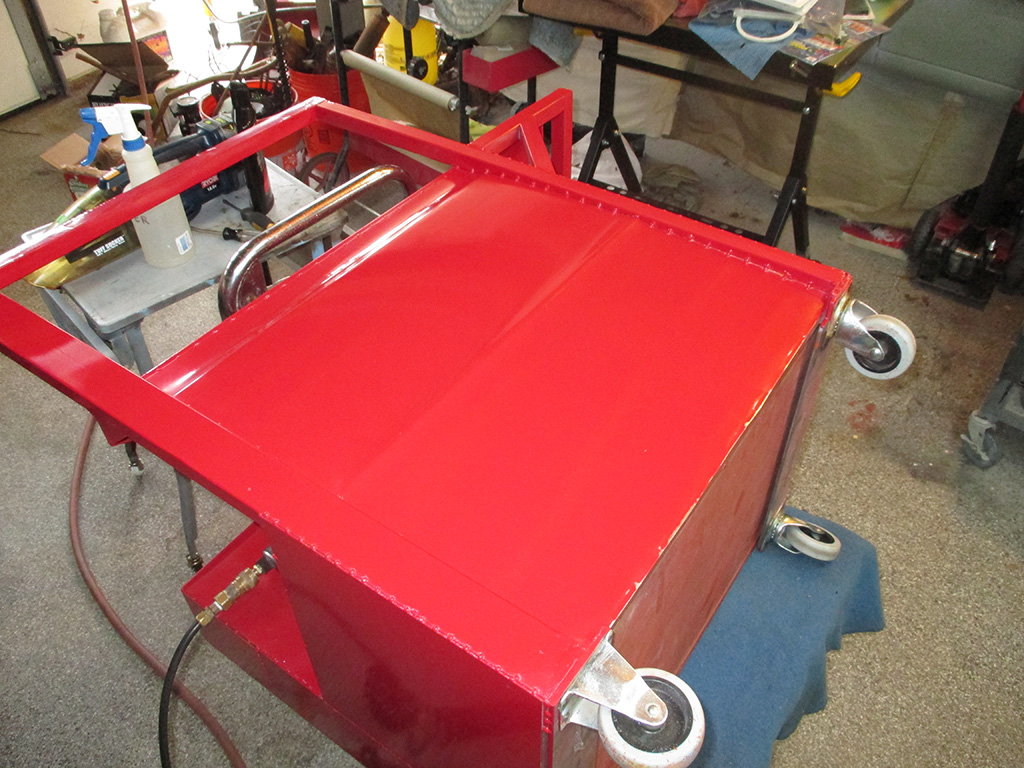
Here's a shot of the finished product. If you look closely (click to zoom) at the back of the welder, you can see where we cut out part of the top shelf to make loading the tank of gas easier by creating a lower "lift-over" than before.
Trust me, even though my tank is smaller than what you'd find in a production shop or the garage of a serious hobbyist, that baby weighs a ton! We couldn't see any reason to lift it any higher than absolutely necessary... hence one more modification to make life a little easier for our intrepid newbie welder.
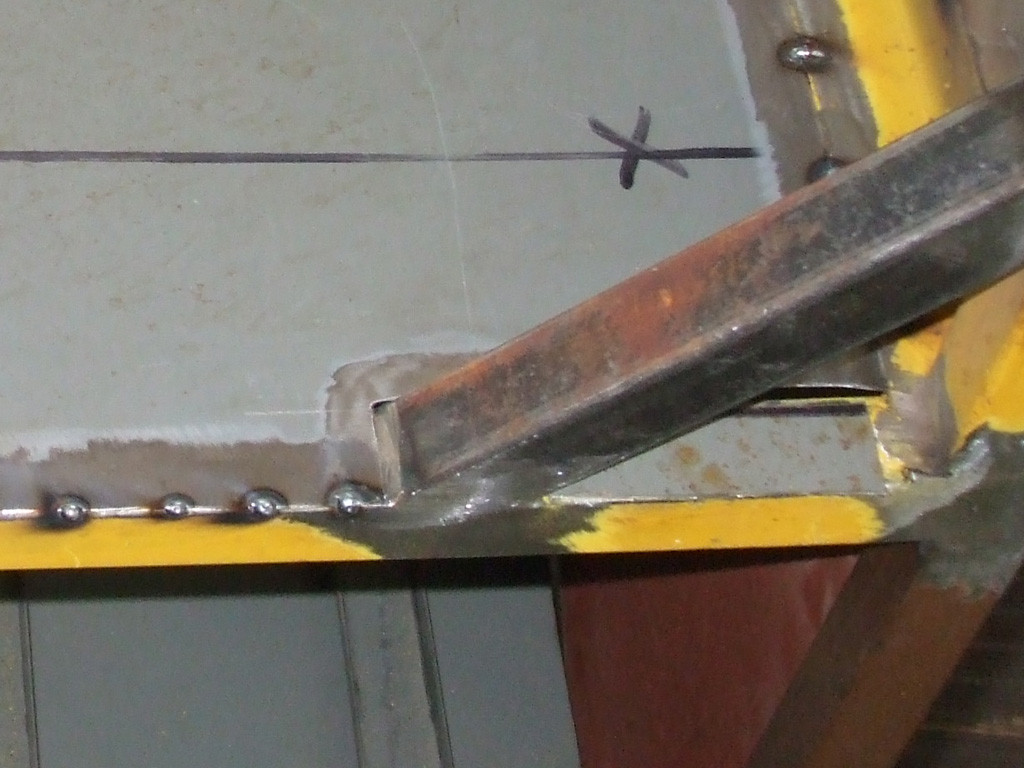
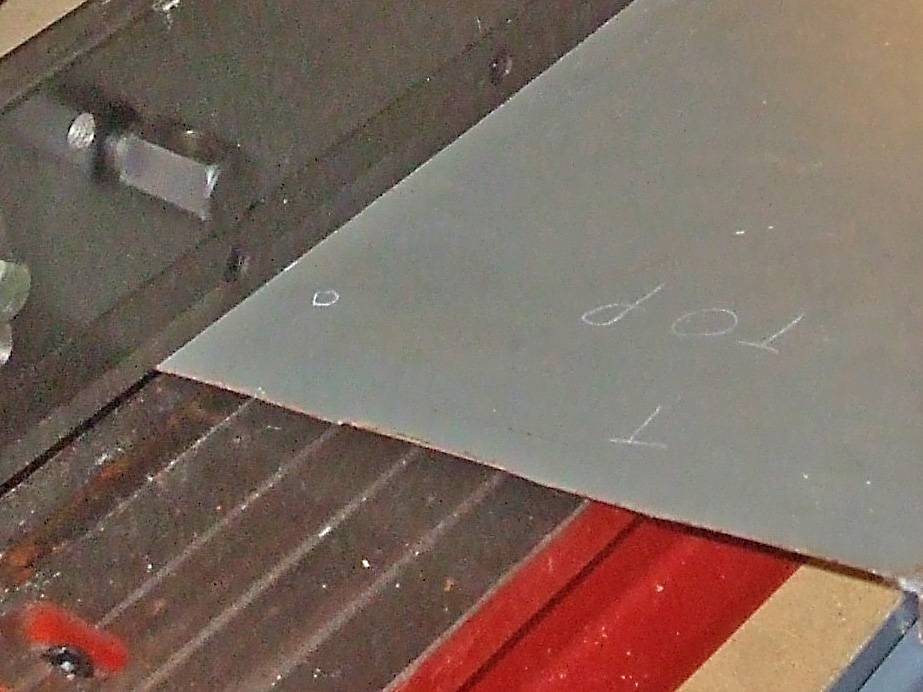
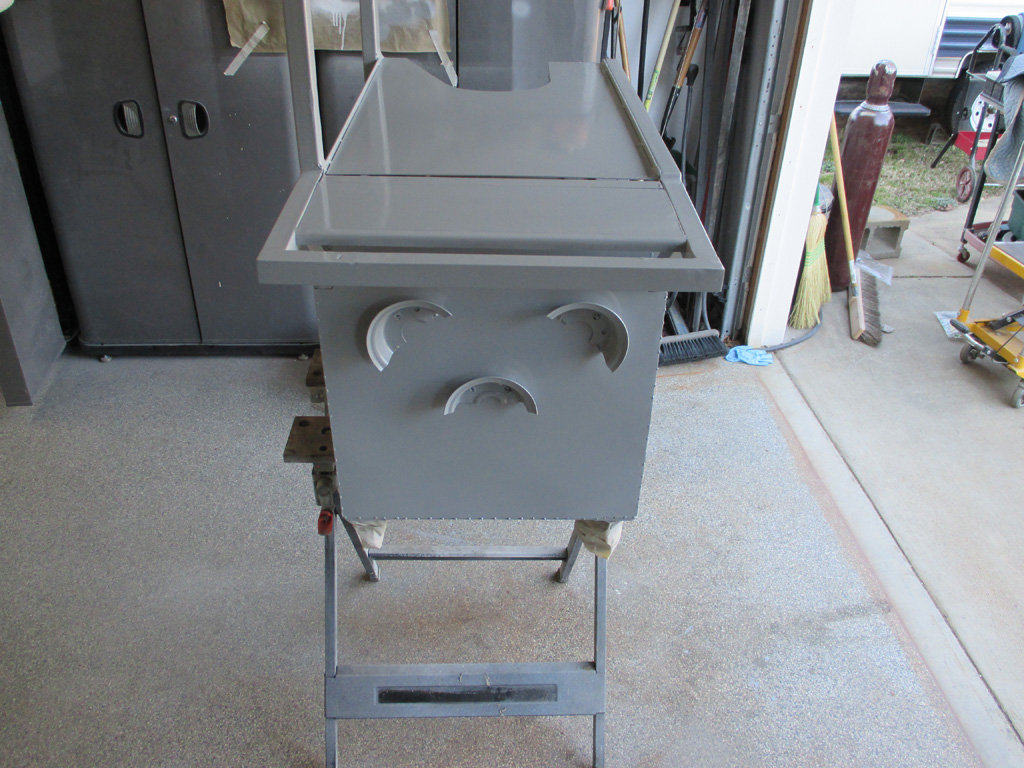
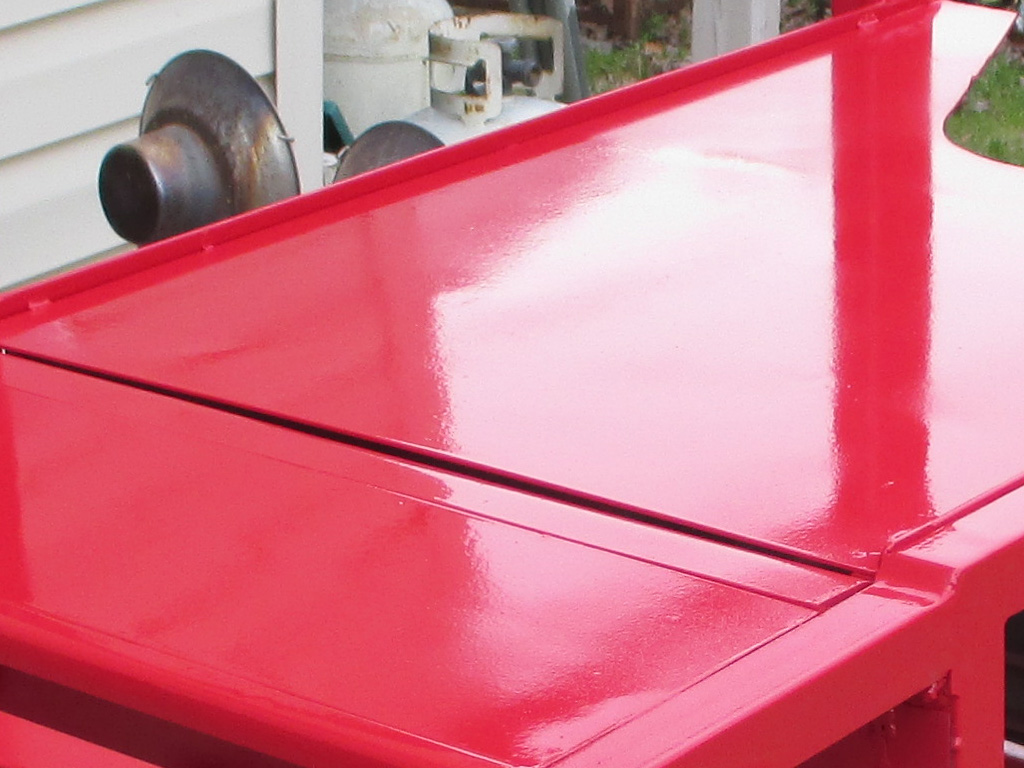
With fabrication pretty much out of the way, it was time to move on to prepping the cart for paint. Since this panel had factory automotive primer, the brown paint of the van was removed, while the primer was left intact as much as possible.
We'd already planned on shooting this with some of the epoxy primer we have on hand, but the conversation quickly turned to the inevitable top coat. We couldn't see rattle-canning the thing like the original builder did, since this is being built to work. In the end we went with a single stage automotive grade finish.
Here's a better shot at the tank end of the cart, where we cut out part of the top shelf. It's tough enough to lift the tank this high... let alone up and over the shelf the welder itself will be sitting on. Getting older isn't going to make this task any easier either, so the original design got modified.
It's also apparent from this angle that I'm not going for perfectly smooth welds either. It would take quite a bit more time to do that and the industrial/steam-punk style hass kind of grown on me as the build progressed. It's going to be real interesting to see it in color after all the work is completed.
Another shot of the handle and the cord storage hangers made from wheel rims that we had laying around. These will give the torch hose more support that just throwing it over a single hook or bar. The broader the support surface, the less chance there is of getting a sharp "bend memory" in the hose which might bind up the wire as it passes through it.
Brandy new casters on display in this shot as well. We did manage to salvage the wheels from the old caster assemblies. One caster had been bent and another had been shimmed. That's why the cart wobbled so bad when I got it... just like a super market cart with a bad wheel. Now though she rolls nice and smooth.

After taking some progress shots following the work my father-in-law and a friend did with the sanding, it's on to the next step. Unfortuneately, the next step is... You ready for this? Cleaning the surfaces as preparation for paint. Yep, spent the better part of Saturday doing just what you see here. Repeatedly wipe down the surface with our old friend "Fast Etch" from Eastwood. I don't think a more tedious, time consuming task has yet been invented.
You just have to keep telling yourself, it needs to be done to ensure proper paint adhesion. This stuff is labeled as "non toxic" yet it removed rust and a ring from a soda can from the bare steel, so something's not quite kosher in that statement. Regardless, I gloved up for this part of the operation.

Paint! - 3/8/14
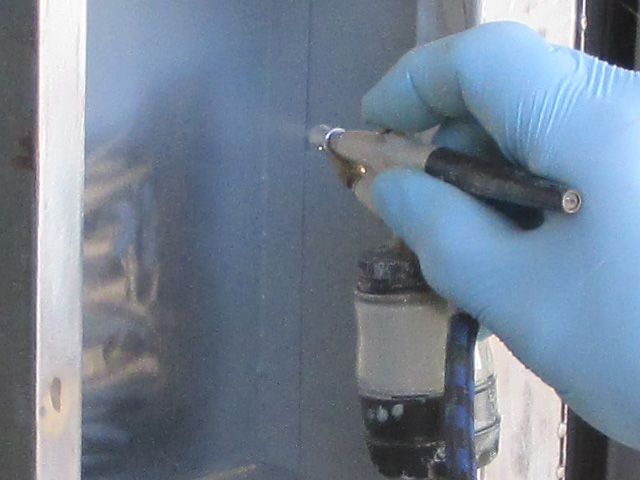
So... After all the sanding, etching and cleaning it was finally time to lay down a little primer on ye olde carte. Because of the close quarters in which we needed to work, an airbrush was used to spray the epoxy primer. Since this is automotive grade primer, it should give us a good foundation for the 2k urethane top coat to come next.
The airbrush worked pretty good on the inside of the cart, where either welds or grinding marks needed to be covered to help prevent rust in the future. The larger spans (like the back panel of the cart), were very time consuming to pull off. The handle end of the cart really let the airbrush shine though. With all the edges of the handle and the cord management rim pieces, it was real tricky to get in close enough.
Now what was I saying about the handle end? We had this great idea of storing the cables beneath the handle, which was wasted space anyway. In a flash of inspiration, we used "wheel quarters" (one rim half - itself cut in half again) as our cable supports.
I never realized there'd be sanding, etching and prepsol to be applied to all those little nooks and crannies. Then you have to think about how the hell you're going to get a spray gun into these close quarters, even a small trim gun. That's where the airbrush came into play.
With the cart in primer, it's amazing how many little things stand out that you might want to change if you'd thought of them during the construction phase. Case in point... I probably would have completely welded all the end panel seams together (with a continuous bead), and ground everything down nice and smooth. That would have made the end panel look like one piece of steel with just the outer edges having the beaded look.
Oh well... too late now. It's taken long enough to get to this point without last minute changes. In the end, it is what it is. The cart rolls smoothly on its new casters and once it's painted to match the welder it'll all be good. The tricky part will be finding storage space in my miniscule shop.
Oh yeah, can't forget the drawer faces and the vertical door for the end compartment. Have to paint those babies too. By this point in the process my hand was getting a little tired of manipulating the airbrush over so many surfaces. The big drawer? I didn't realize just how big it was until I tackled it with the itty bitty airbrush.
This shot also reminds me that we've got to whip up some drawer handles too at some point. After much deliberation in the hardware store that time forgot (nails sold by the pound, all manner of electrical equipment too), we decided the best solution would be to fabricate our own. To that end, some 1/4 inch square stock was purchased, which will be sprayed in a contrasting black, again mimicking the colors of the welder.

One last full frontal shot at the end of the day. By the end of the day the optimal temperature was slowy falling, so a second coat was not in the cards. Even so, I made sure to overlap each pass with the airbrush, looking at the reflection in the paint as I went, doing my best to "wet it out."
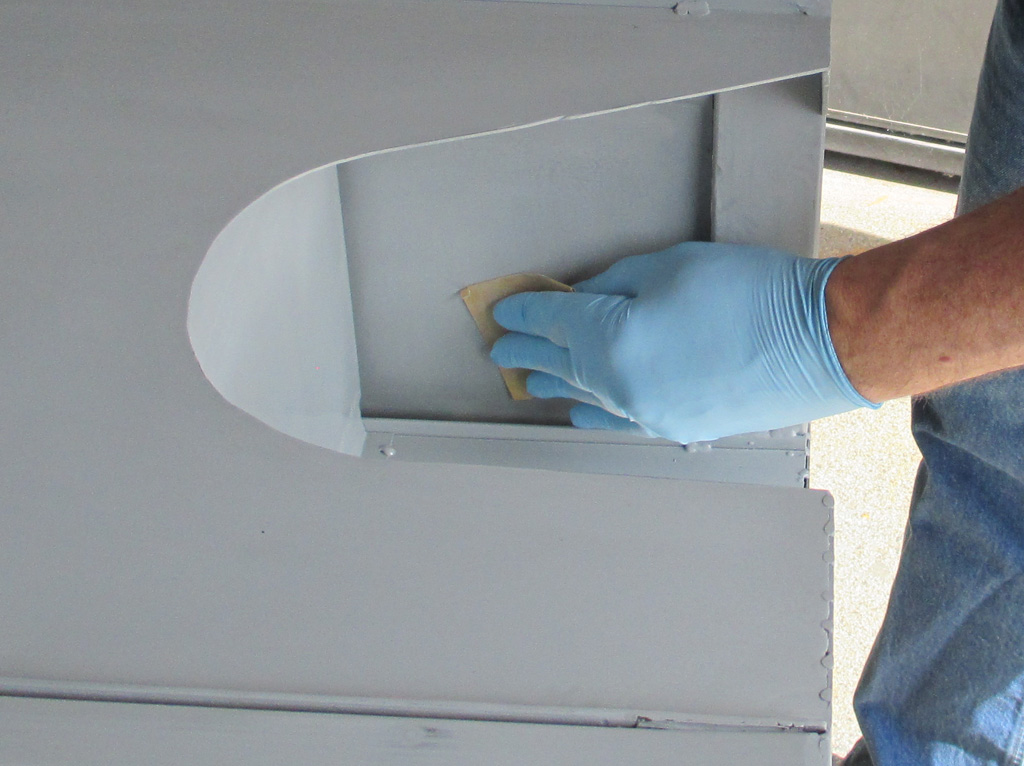
Once the drawers are in place you will never see the original shelves, which stand out like a sore thumb as the last remnants of the original yellow paint. The edges were sanded and shot with primer because they might be seen with the drawers open. The end compartment where the door is will be done in its entirety, because it will be seen.
Color! - 3/15/14
When I arrived Saturday morning, my father-in-law had sanded most of the cart, leaving some of the smaller areas remaining to be done. As always, I gloved up to keep my oily fingerprints off of the surface. Some 400 block sanding was just what the doctor ordered to scuff the surface for the top coat.
I tried using a green Scotchbrite first, but it didn't seem to be doing much compared to the sandpaper. Granted the goal is only to provide enough "tooth" for the paint to bite into, but if I'm having trouble seeing those scratches, I want something a little rougher. That's where the sandpaper comes in.
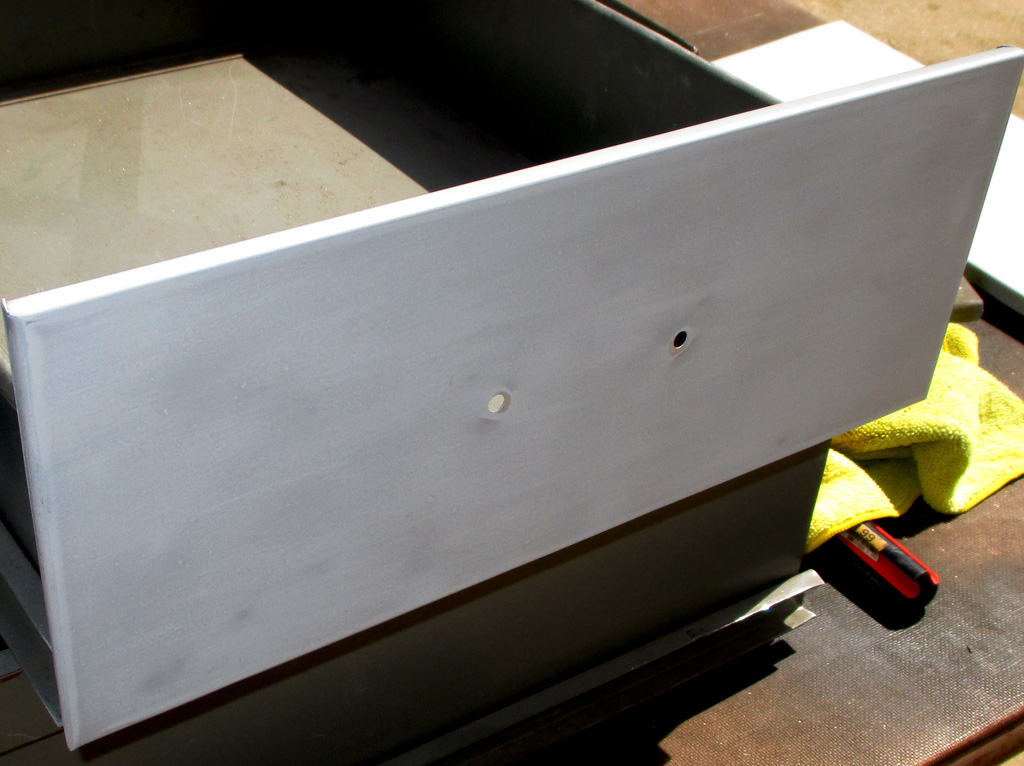
Can't forget the drawers now, or the vertical door either. When you click through for the zoom, you can easily see the imperfections (low spots appear darker), in the face of the drawer I'm focused on here. The handle mounting holes especially have little divots around them, undoubtedly from years of use and abuse, being slammed shut over and over.
Sanding the primer also smooths out some of the orange peel or texture in this coat. The objective here wasn't to make these perfect, even if I "glassed" them smooth, I'll probably be slamming them shut too, so why risk having the bondo (and paint) flake off? Better to just make the appearance as good as we can with paint only.
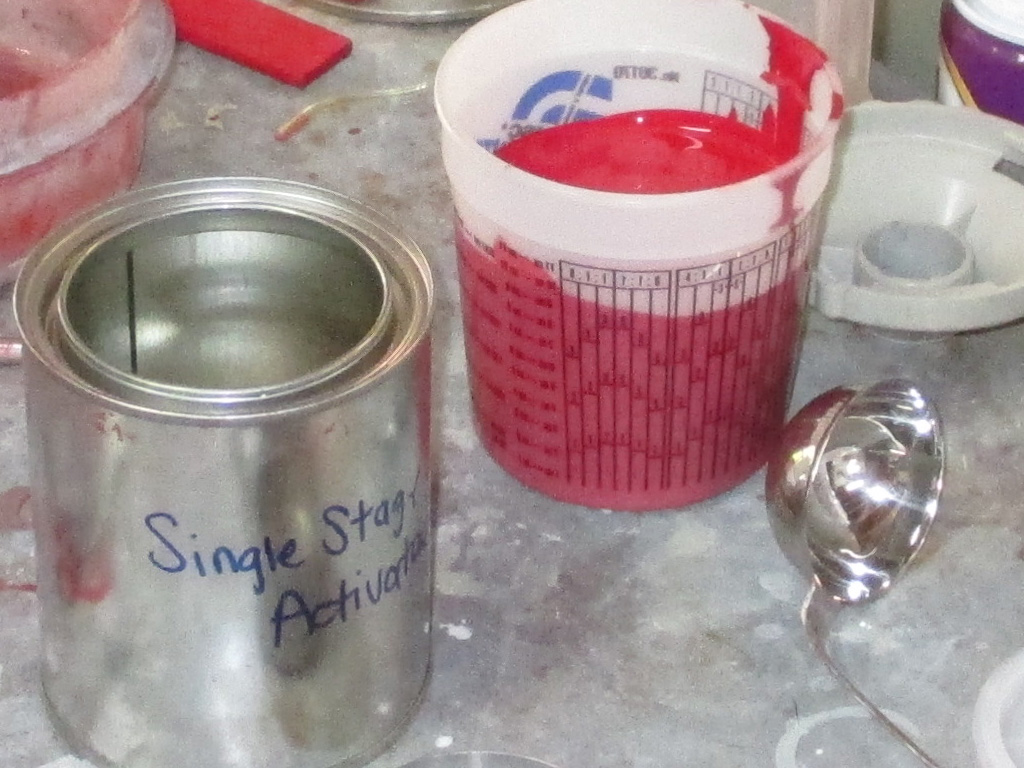
The paint we're using (labeled as "Cardinal Red"), was mixed to match the door of the welder which I took with me to the paint shop. As always, if you're going to try and match existing paint, the best thing to do is to take a sample with you. I did the same when ordering touch up paint for my van.
We're using a single stage (also known as 2k) urethane paint, mixed to a 4:1 ratio of paint to activator. I asked the woman mixing the paint to add a flattening agent, since I knew the surfaces of the cart are hardly perfect, so there's no need calling attention to all the little imperfections. She said I could "over-activate" the paint for an even flatter appearance.
After allowing sufficient time for the first coat to flash off (recoat window), we moved the cart outside to better see the reflection of each pass as it was layed on. Yes, there's a texture to the paint, but if you look closely at a tool box or cabinet, it doesn't exactly have a mirror smooth surface. There's a gloss, but it's subtle, hence my ordering the paint with a flattening agent added.
Overall, I think this will be a much more durable finish than if I'd rattle-canned the thing like the cart's original builder did. I'll admit that was the plan initially, but the more we discussed the intended use of the cart (cables being up agains the finish etc.), the more sense it made to use a tougher paint. It wasn't cheap at close to $90 bucks for the color coat alone; the primer we had on hand (earmarked for use on the Monte, but it's pricey as well), but you get what you pay for, especially when purchasing auto-related products.
The gallery below (click to zoom) will give you some idea of how the finished product turned out. The drawers were interesting in that they looked flat sitting on the table from the standing perspective, only appearing glossy if you squatted low enough to look for a reflection in the surface.
FRONT VIEW
REAR VIEW
TOP LEFT
TOP RIGHT
TANK STORAGE

DRAWERS
Overall, I think the project turned out just fine. It isn't perfect, that wasn't our intention. The intent was to end up with an industrial/steam-punk looking cart, a no-nonsense, tough, garage engineered piece done the way we wanted. Next up... drawer handles.
With the cart almost ready to go, it was time to whip up some handles. The original handles (vintage looking chrome V's), were pretty beat up upon close inspection. Two hardware store trips proved that no new handles would match up with our pre-drilled drawers so... we decided to make some.
MEASUREMENTS
TESTING STANDOFFS
One hardware store had a 48" section of 1/2" square stock which we felt would fit in well with the handles on the cart itself. The original V-handles had about a 1" standoff and were 2-3/4 inches between screw center points. Every prefab handle we measured was 3 inches between screw center points, requiring drilling new holes (and welding up the old ones), or somehow covering up the old ones with an ornamental plate of some sort.
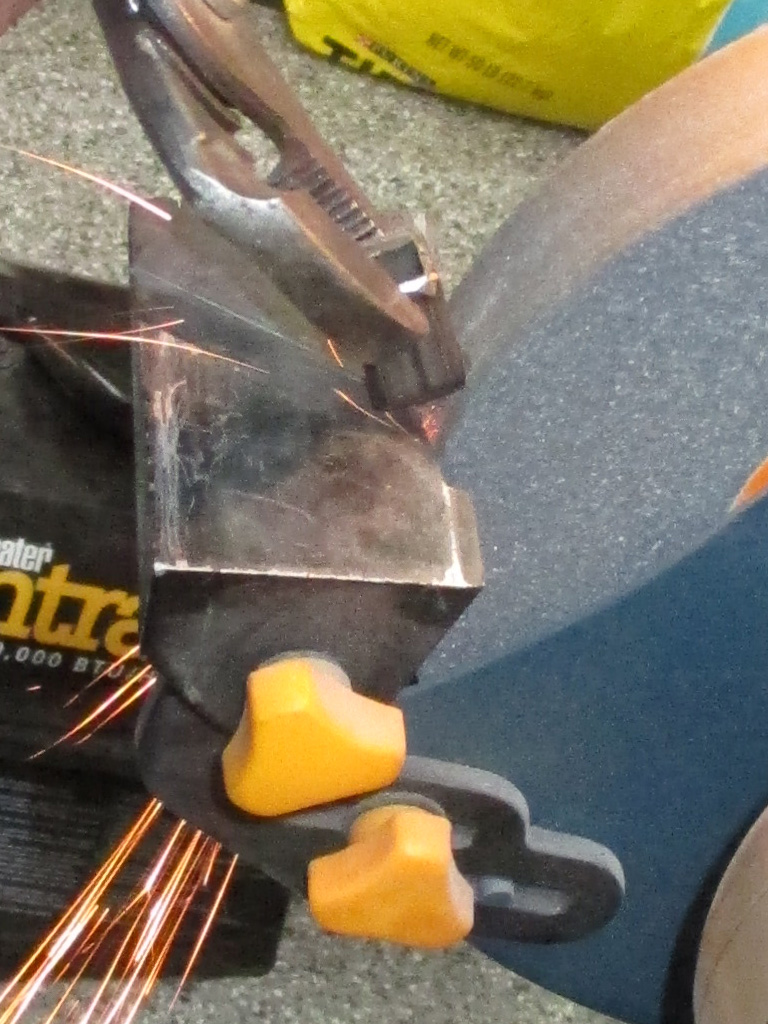
With the measuring process behind us, it was time to cut all the pieces to length. A Central Machine chop saw fitted with a fiber metal cutting disk made short work of the steel stock we'd selected. The more we worked with the square stock the more I became convinced we made the right choice.
Once we cut all the standoffs (and quenched them in a cup of water we had at the ready), we began the process of prepping them for the next step. When we bought the square stock we also picked up some nuts that would just fit inside the material so we'd have a way to attach the new handles to the drawers and door.
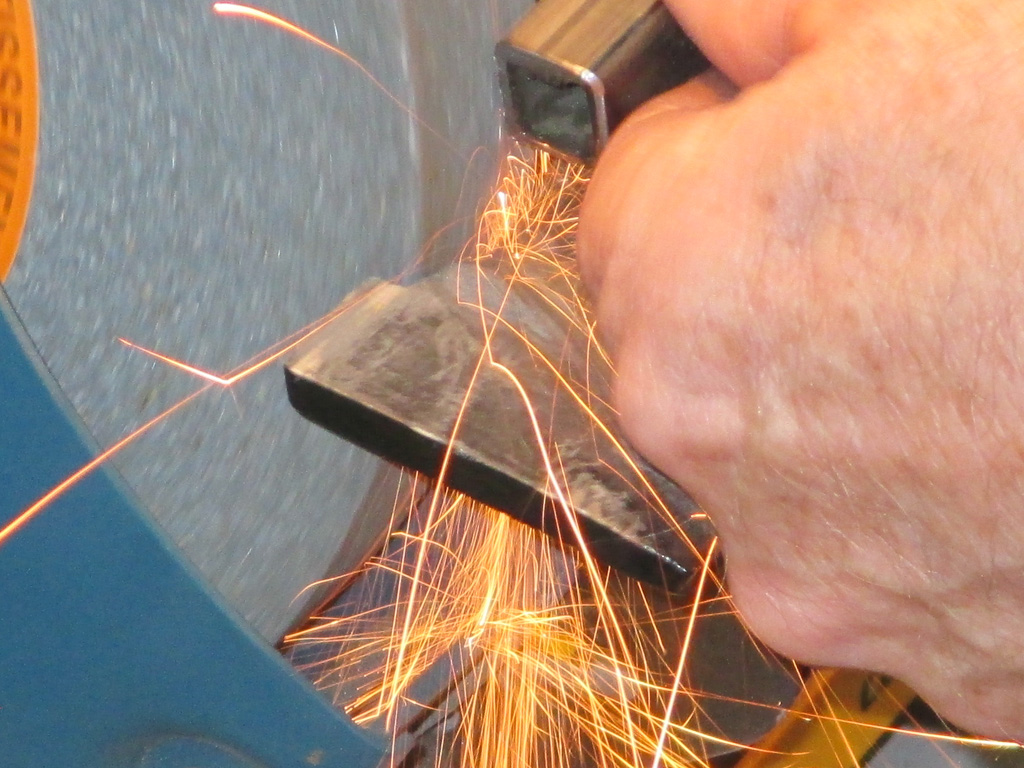
Cutting all our pieces to length was only the first part of the operation. The next step was to smooth and deburr all the pieces. You have to have just the right touch here, as even the finer wheel of the grinder will take off way too much material if you're not paying close attention.
After the first couple of pieces, I found the sweet spot of just the right pressure and length of time to remove only the burrs left by the chopsaw and no more. Since the edges of the stock are slightly rounded, I had to rotate the stock (making sure I had a good grip on the pliers) so all the surfaces were smoothed off.
With all the standoffs done it was time to take care of the actual handles themselves. Since they were longer, the process was easier since the pliers were not needed. You just sort of get into a rhythm and the extra length really helps you maneuver the parts against the wheel much better.
At some point, I'll have to use a small file to remove the burrs from the inside of all the pieces of square stock, but for now, this will have them ready for the next process. We have to weld the nuts (one inside each end of the eight standoffs we cut), that match the mounting screws for each handle.
This was the tricky part, my father-in-law took care of welding each nut into place while I was busy at the grinder prepping the individual parts. I'm still a novice when it comes to welding and trying to hit a target as small as the nuts inside the handles had to be tricky to pull off. Only two screws got welded to the nuts by accident, I'd call that a pretty good success ratio.
WELDING NUTS
SET UP HANDLE
We used the door itself as a setup jig, screwing the two standoffs to the inside of the door (so welding spatter wouldn't ruin our paint job), then clamping the handle to the standoff for a tack on each end. Then we disassembled the whole affair for the actual welding. We used the large drawer to setup the three handles that were the same.
Here's one of our first mockups of our first handle. The original handle had a standoff of about one inch. When we tried that, it looked to be too deep, so we settled instead on 3/4's of an inch for each standoff, which seemed to fit the drawers best.
This shot was taken just prior to welding, but after grinding off the burrs so we wouldn't mar the freshly painted surface. Have to say that I'm getting way more gloss out of the paint than I initially thought I would. If this is the paint with a flattening agent added, I can only imagine the shine had I used the paint without it.
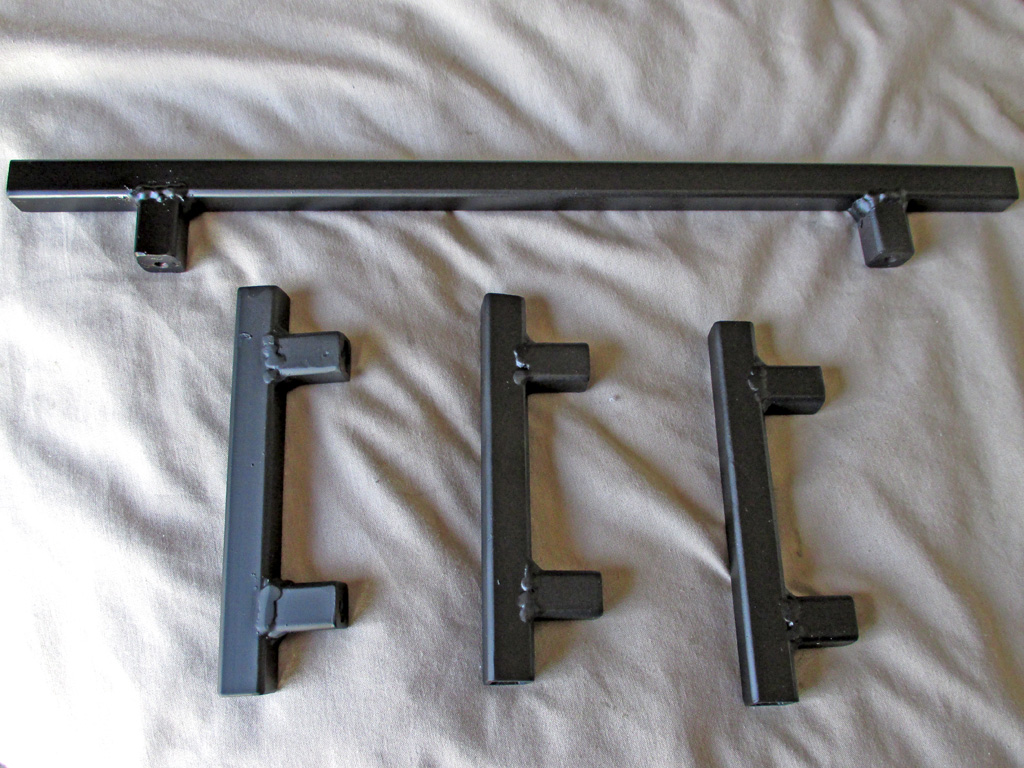
So here we are. Four new handles, freshly welded, which fit all of the pre drilled holes in all the drawers as well as the completely fabricated door with matching handle. I'm sure if I hopped on the 'net I could've found something that would work, but I'm reasonably certain it would've cost more than what I spent here.
HANDLES DONE
DOOR MOUNTED
The last item on the agenda was to re-attach the door hinges as well as the door itself. The hinges are a weird cantilevered afair that move the door out and pivot it to a 90* open position at the same time. Cool beans and available at a big box home improvement store near you. All I have to do now is... paint the handles!
After welding, grinding, filing and wiping down with Prepsol, it was finally time to finish the handles. As with other aspects of the cart, the welds were only touched up a bit, not ground smooth, to match our design. These handles will be much sturdier than those originally mounted to the metal drawers.
There was a lot of fiddling about with different sizes and standoffs as we were developing these. In the end I would have to say the results were well worth the effort. With this stage finished, all that remains is the final assembly and addition of the tools that the cart was designed for.

My original thoughts had been to use some of the Chassis Black paint left over from the Monte. Two basic problems prevented this. First, the paint had congealed in the bottom of the can and was basically unusable. Reason two is the nature of the paint offers no protection against UV, which the cart might be exposed to during use.
So... this meant another solution needed to be found. Enter "Zero Rust". This paint has a high solids formula that I hope will result in a tough long-lasting finish for the handles once they are put into daily use. One coat of primer and three coats of satin black (not shown) and we're good to go.
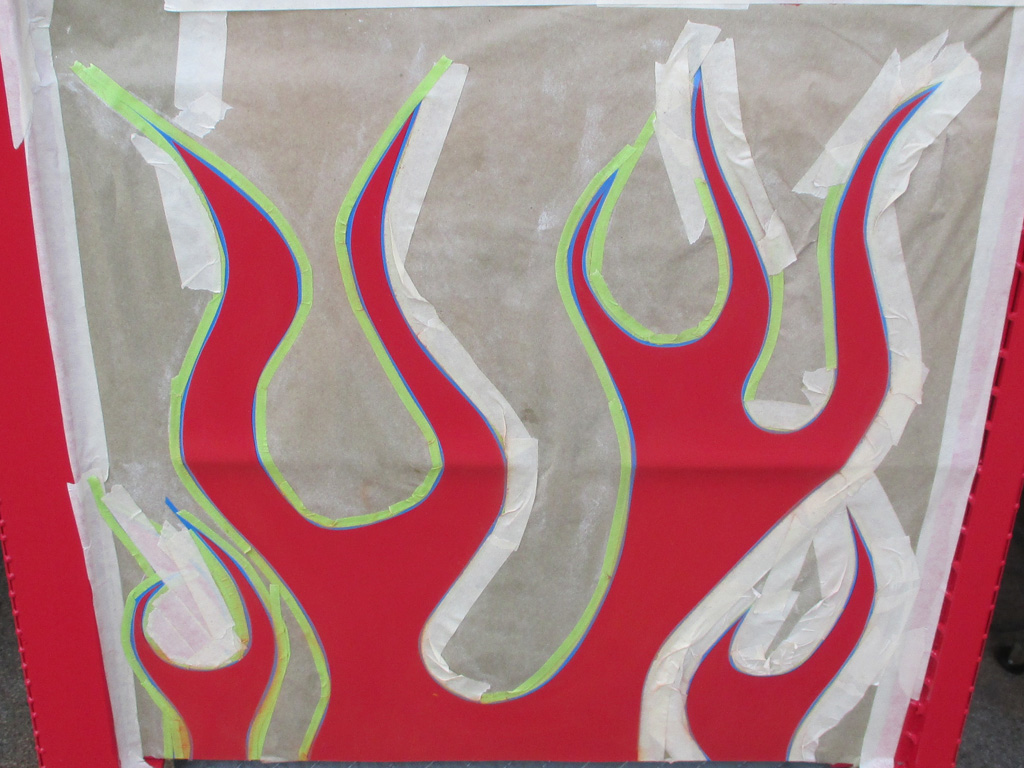
Although the back panel of the cart looked pretty good, it was kind of plain when you get right down to it. What to do... what to do. It was decided that an added feature of the cart will be a traditional hotrod style flame job! Step one was to take some 1/8 vinyl tape and layout some flames. An hour or two studying various types on the internet gave us some idea of the colors used vs. the colors that would look good against the red paintjob.
Next we went around the 1/8 tape with some 1/4 inch tape. A layer of masking paper and some chalk gave us the outline. Some careful work with an X-Acto knife with a rounded blade run along the center of the two strips of tape and we'd cut out the area that will be flamed. The next step will be to break out the airbrush, some hobby paint and start spraying.
Here we are in the first stages of painting the flames. You sort of work in reverse, laying down the base color, then use each subsequent color to block off part of the previous layer to achieve the desired effect. I've seen guys use an airbrush to create murals and it's very impressive to watch. The difficult part is trying it yourself. You need the right equipment, the right paint and tons and tons of practice.
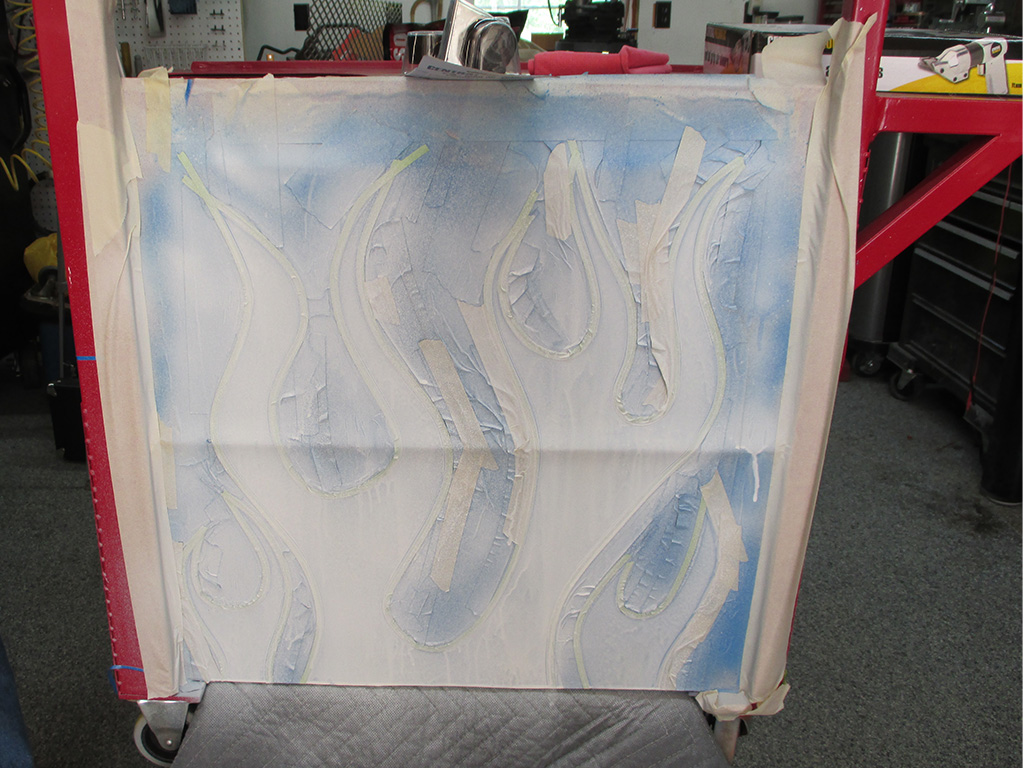
WHITE BASE COAT

LAYER TWO
All the books and You-Tube videos are great, in that they show you what to do. The hard part is trying to achieve those results with very little experience. You end up trying to learn the technique and learning to use the airbrush at the same time. The paint we used had a very low level of solids to solvents ratio which (once thinned to spray consistency), gave us a transparent effect we didn't want. Generally speaking, the higher the solids level, the higher the cost of the paint. Specialty airbrush paint is about $14 per pint as of this writing. That's steep!
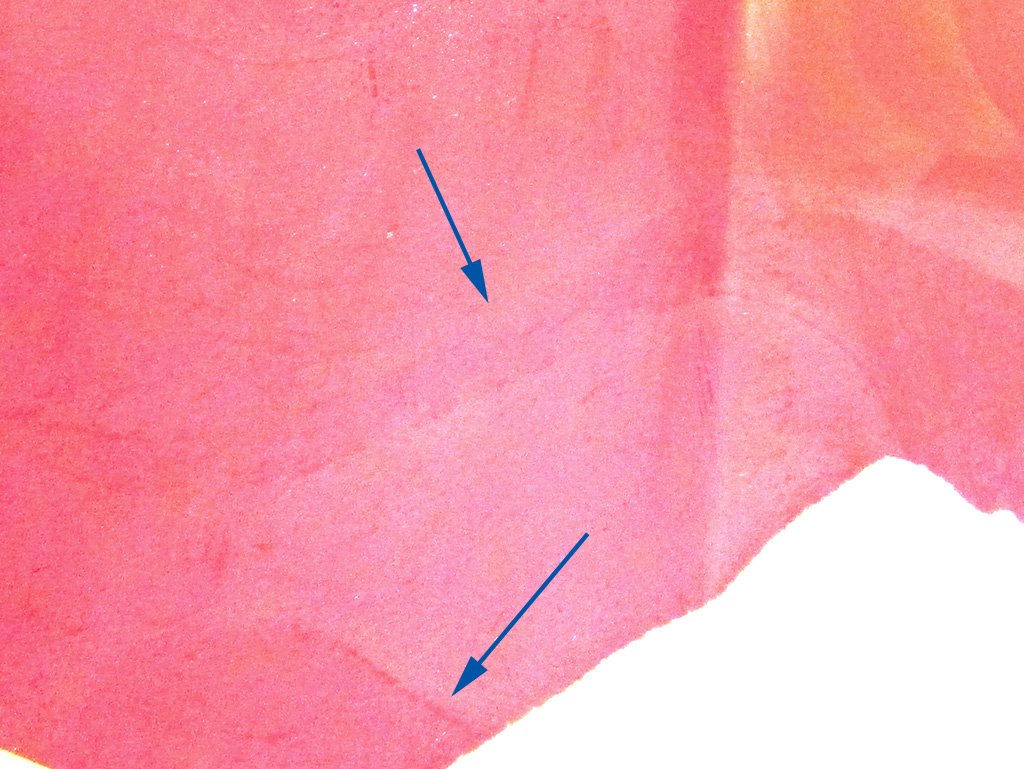
I played with the contrast a bit in this shot to make the "ghost" flames stand out better. When we had masked off the area we wanted to airbrush, we scuffed the surface with a Scotchbrite pad so the paint would adhere well. When we ultimately decided against the flame job, we needed to blend things together so it would not be quite so obvious.
We used laquer thinner to remove the latex airbrushed section, the urethane paint not being phased in the least. Then we decided to remove the masking tape since some of the previous paint had bled beneath it. This meant we would basically have to start over again from scratch. Even worse... we'd have to perfectly match the previously masked area since we'd prepped it for paint. We would need more paint too, black, orange and blue to make it look right. So we pulled the plug.
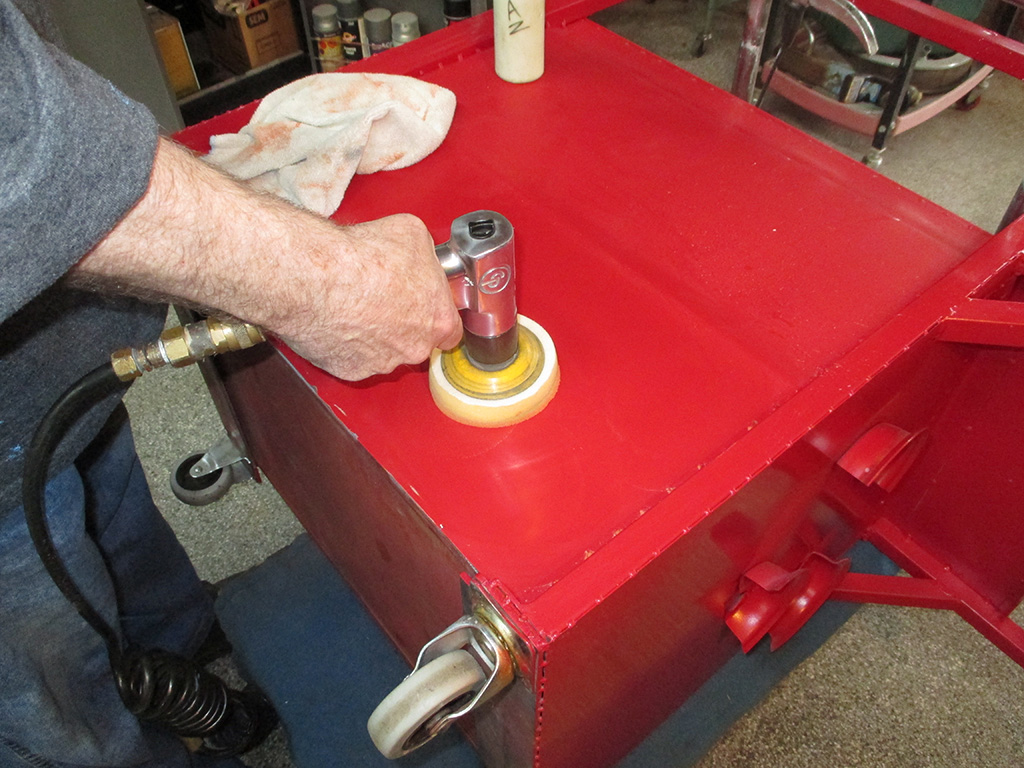
WE POLISHED...
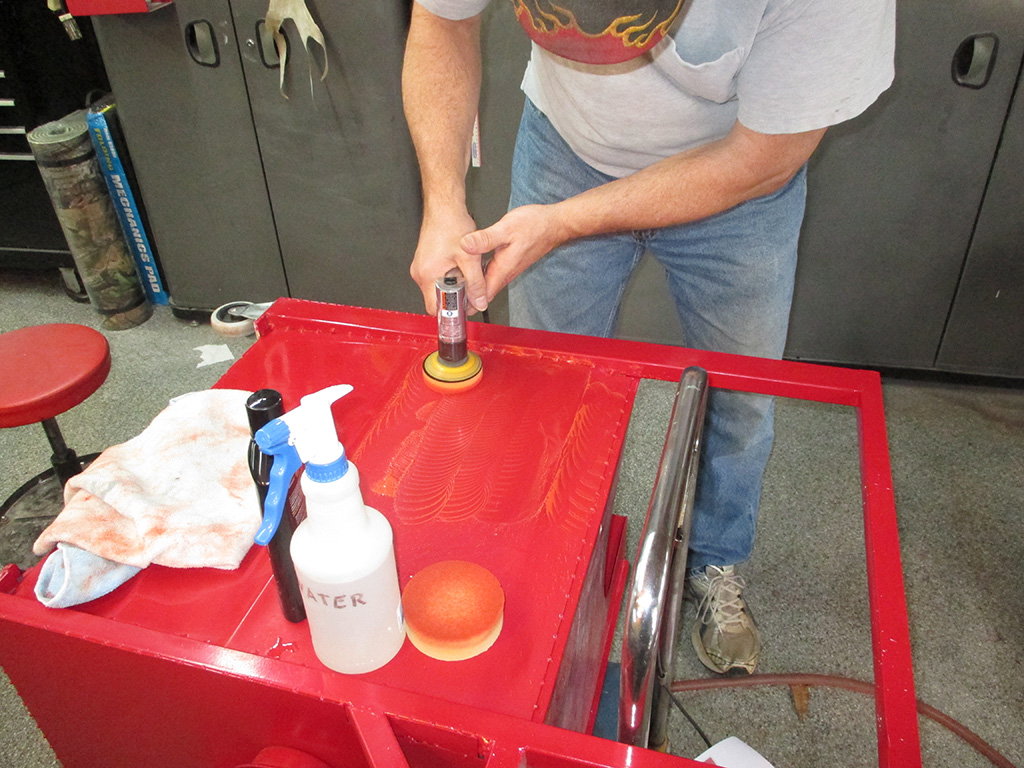
AND POLISHED SOME MORE
In the end you couldn't see the flames any more! Who knows. In the future, I may decide to revisit the flame job again. For now though, I've got bigger fish to fry and with an extremely limited budget, I made the best decision. I could also use the area for stickers, which I had plastered all over my stuff back in the 70's. Time will tell I guess.
Where does the money go? Quality paints tend to use costlier components, which results in higher production costs. Quality paint also has a higher concentration of solids. As a result, higher quality paints are are easier to apply, flow better during application, require fewer coats for the same coverage, have better hiding characteristics, hold color better, and give a longer service life. Right now, I just don't have the long green for the quality paint for this particular job.
The end product. Not too shabby even if I do say so myself. Now all I have to do is find all the welding related stuff I've got squirreled away all over the shop.
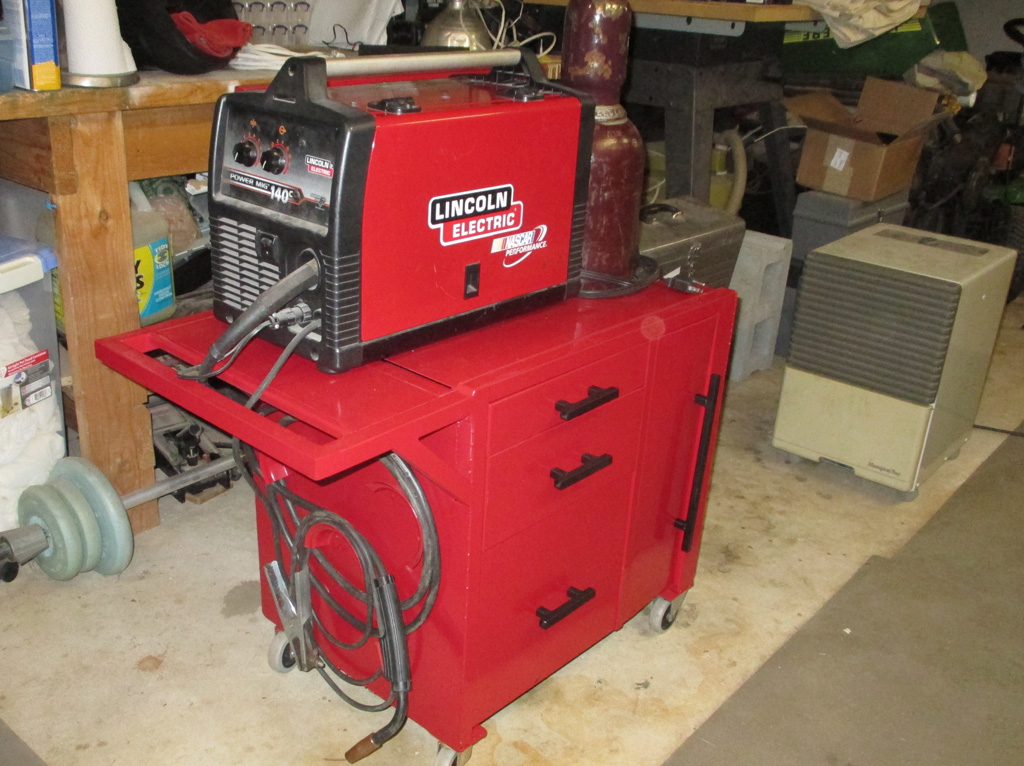
HANDLES ON
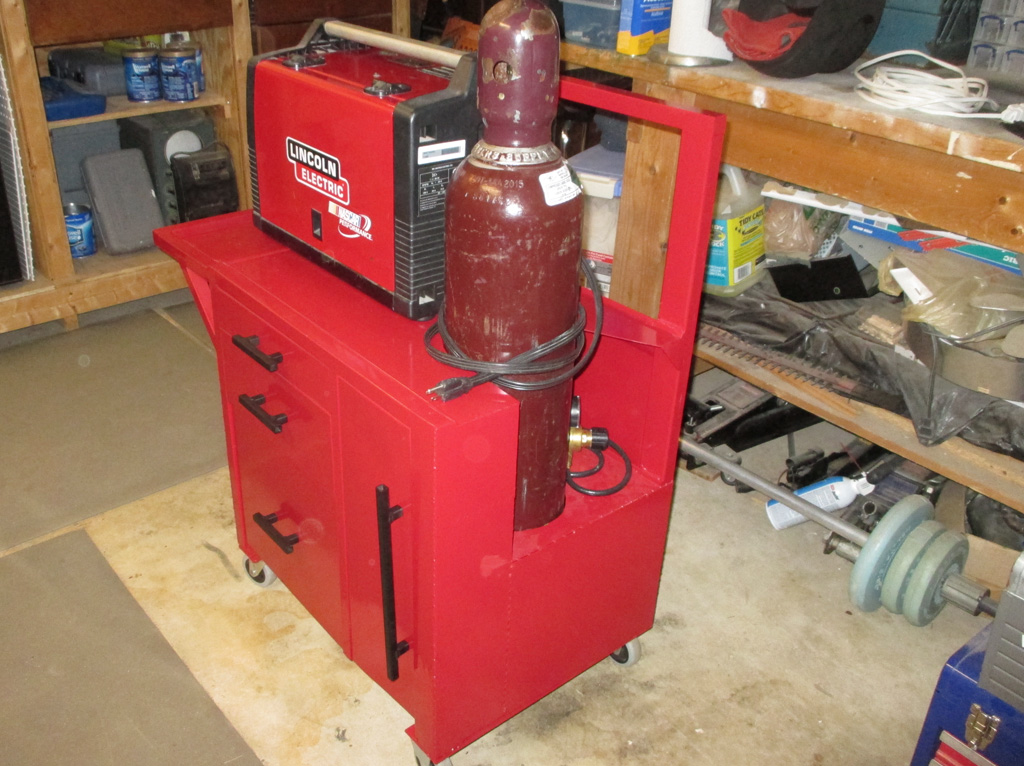
TANK IN

BACK VIEW
The side where we'd tried the flame-job really doesn't look all that bad. Assuming I store it up against a wall, you're unlikely to see it very much anyway.

© Copyright 2009 Brian Petruska | Top | Upgrades | GM Performance Parts | HTML Now! | Apple | Comments |